A grade in OpenSky is one student in one school year — Caleb's 7th Grade, say. It is more than a label. It is the bucket your records hang off: the courses you assign to a grade are the courses that show up under that grade on a transcript, the attendance days counted for that year, and the set the gradebook shows you at a time.
That is why grades live in two places, and why they work the way they do. The school year and everyone's grade level are set on the calendar, because a school year belongs to your whole household and every student moves through it together. Which courses belong to which grade is set from the grade dropdown on the gradebook, because that is a per-student decision you revisit as courses come and go.
If you have not added courses yet, start with How to Enroll a Student in a Course.
Why bother assigning courses to a grade
You can teach a course without ever touching this. Lessons land on the checklist either way. Assigning courses to a grade is about the record of the year rather than the day-to-day:
- Transcripts. A transcript is built by picking grades. Each one prints as its own section — the grade level, the dates, days present and absent, and the courses assigned to it with their credits. A course in no grade appears on no transcript.
- Attendance. Days present and absent are counted against the grade's date window, so the totals on a transcript match the year you actually taught.
- The gradebook. The gradebook shows one grade at a time. Assigning courses is what decides which ones you see when you switch to it.
A course belongs to at most one grade. That is deliberate — it means credits are never counted twice across two years of a transcript.
Set up the school year
School years are managed on the calendar, for the whole household at once.
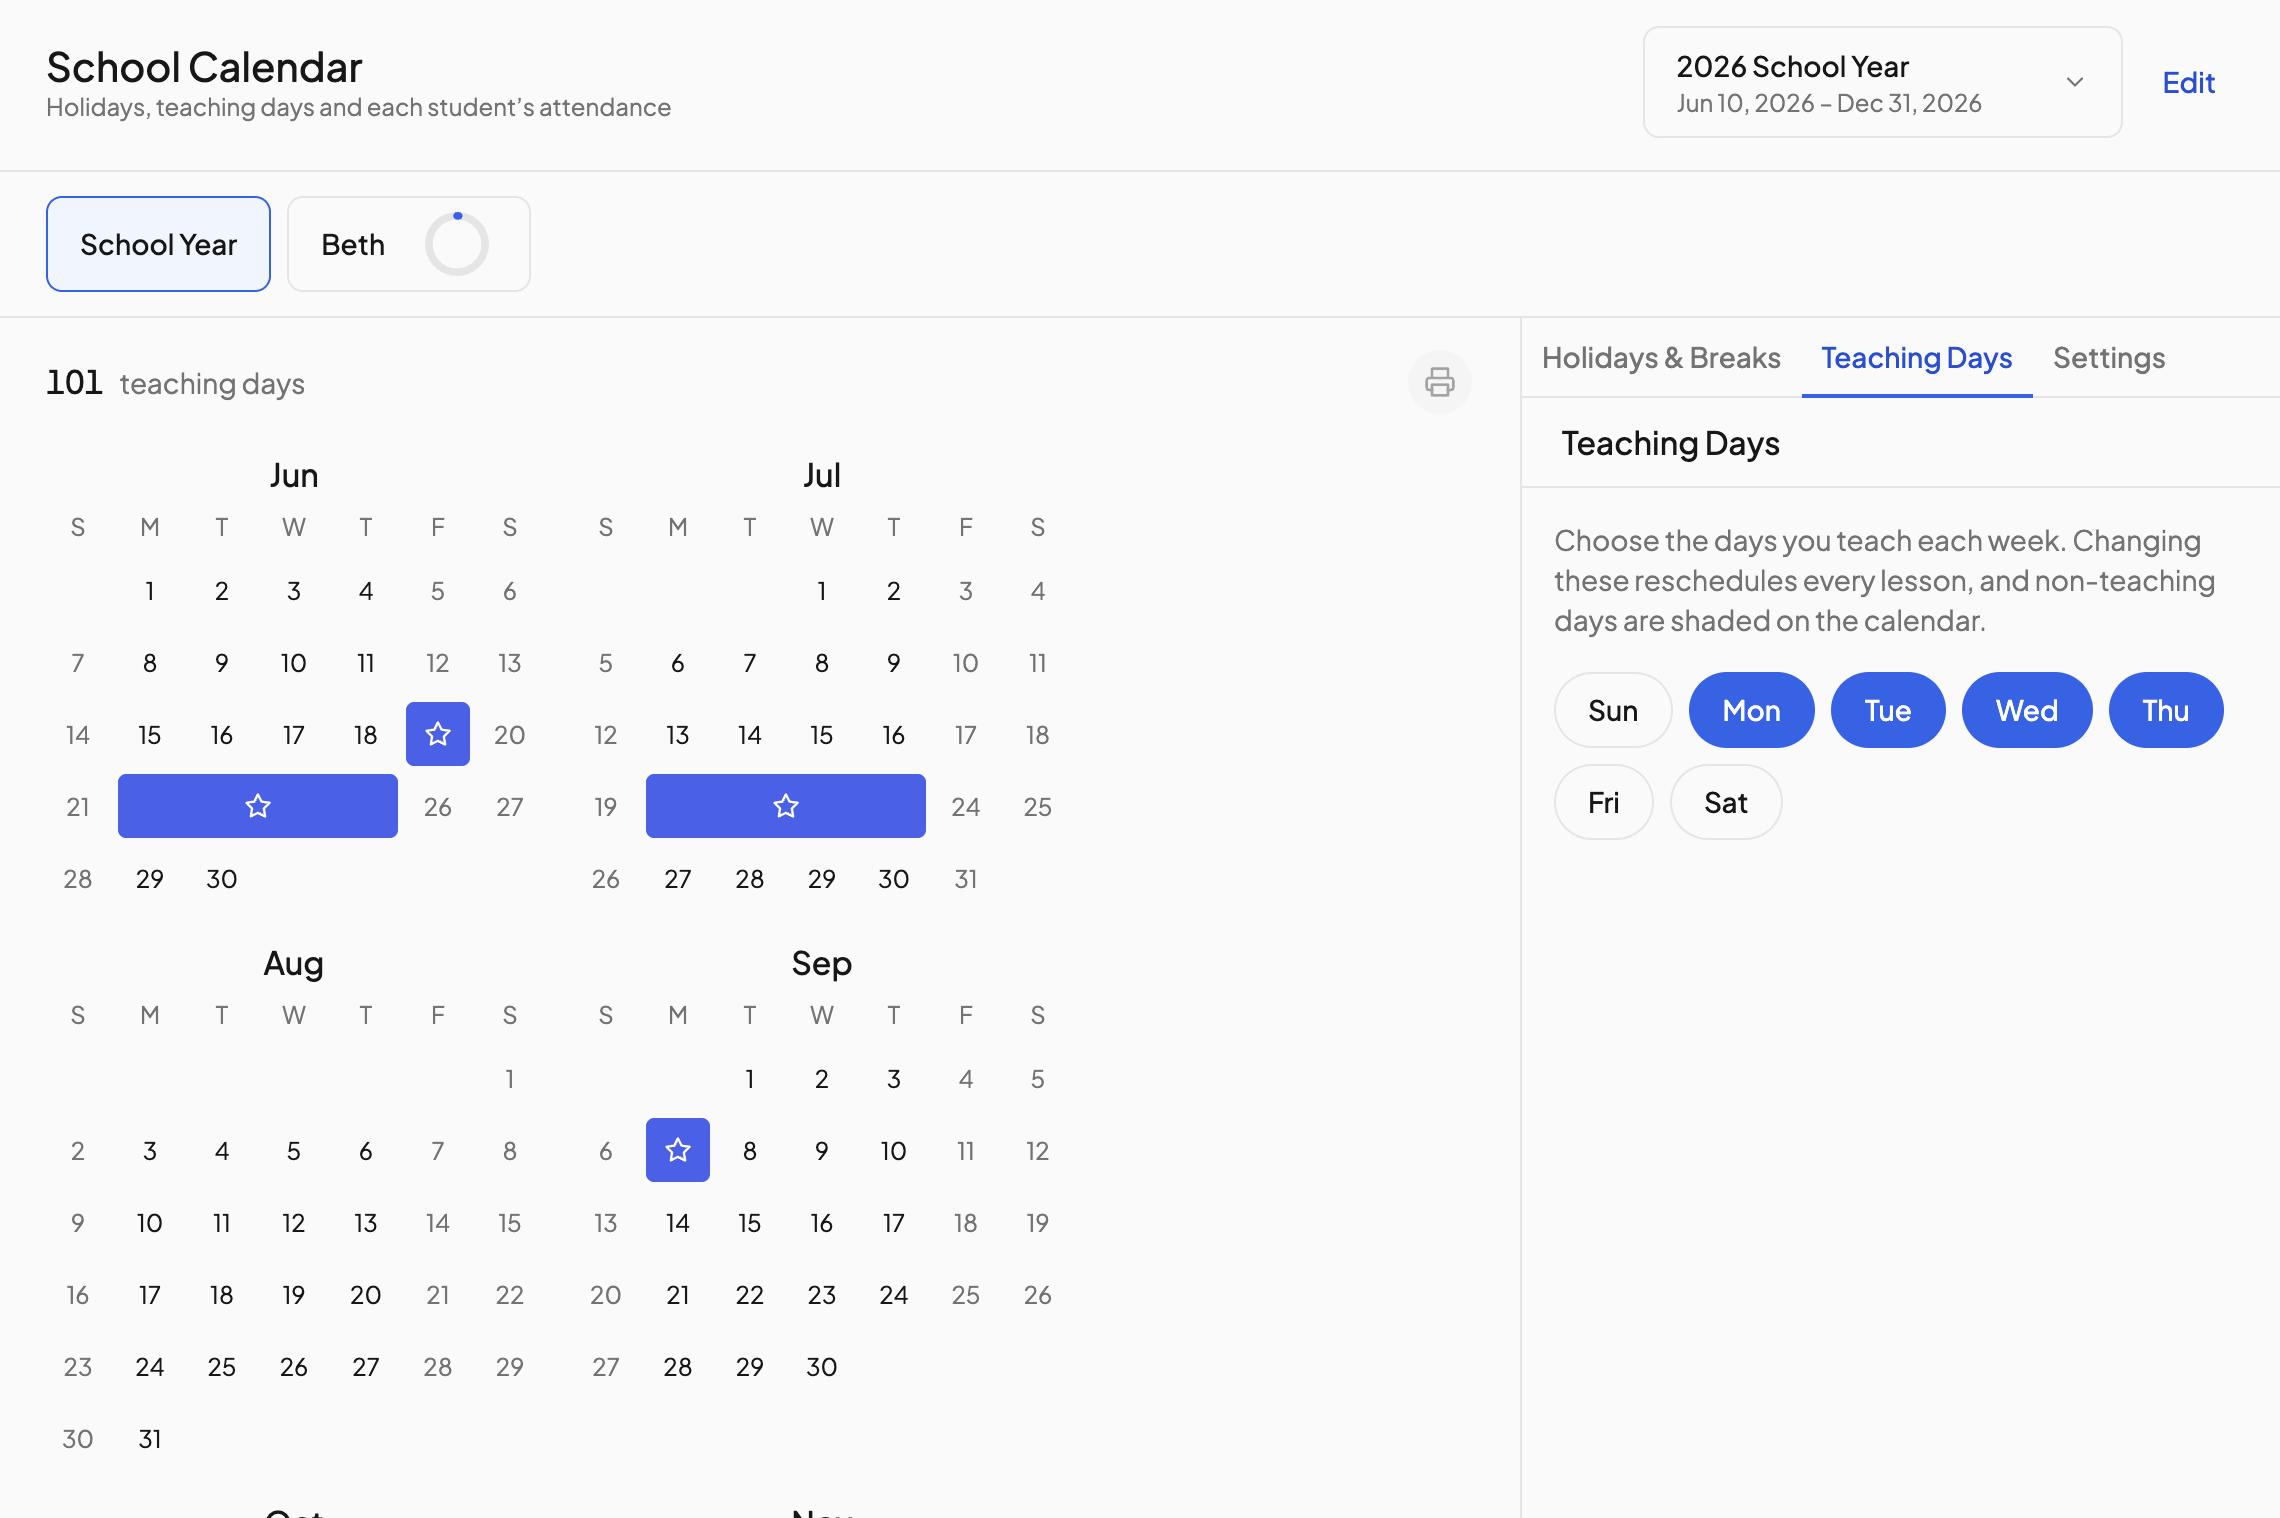
- Go to Calendar.
- Use the year picker in the header to choose a school year.
- Click Edit beside it to open School Years.
You get one card per school year, with every student listed underneath. The card header holds the year's name, its dates, and an Active badge on the year your household is currently in.
From the ⋯ menu on a card you can:
- Set as active — this is the year every term picker in the app opens on.
- Edit name & dates — changes the year for everyone following it.
Set each student's grade
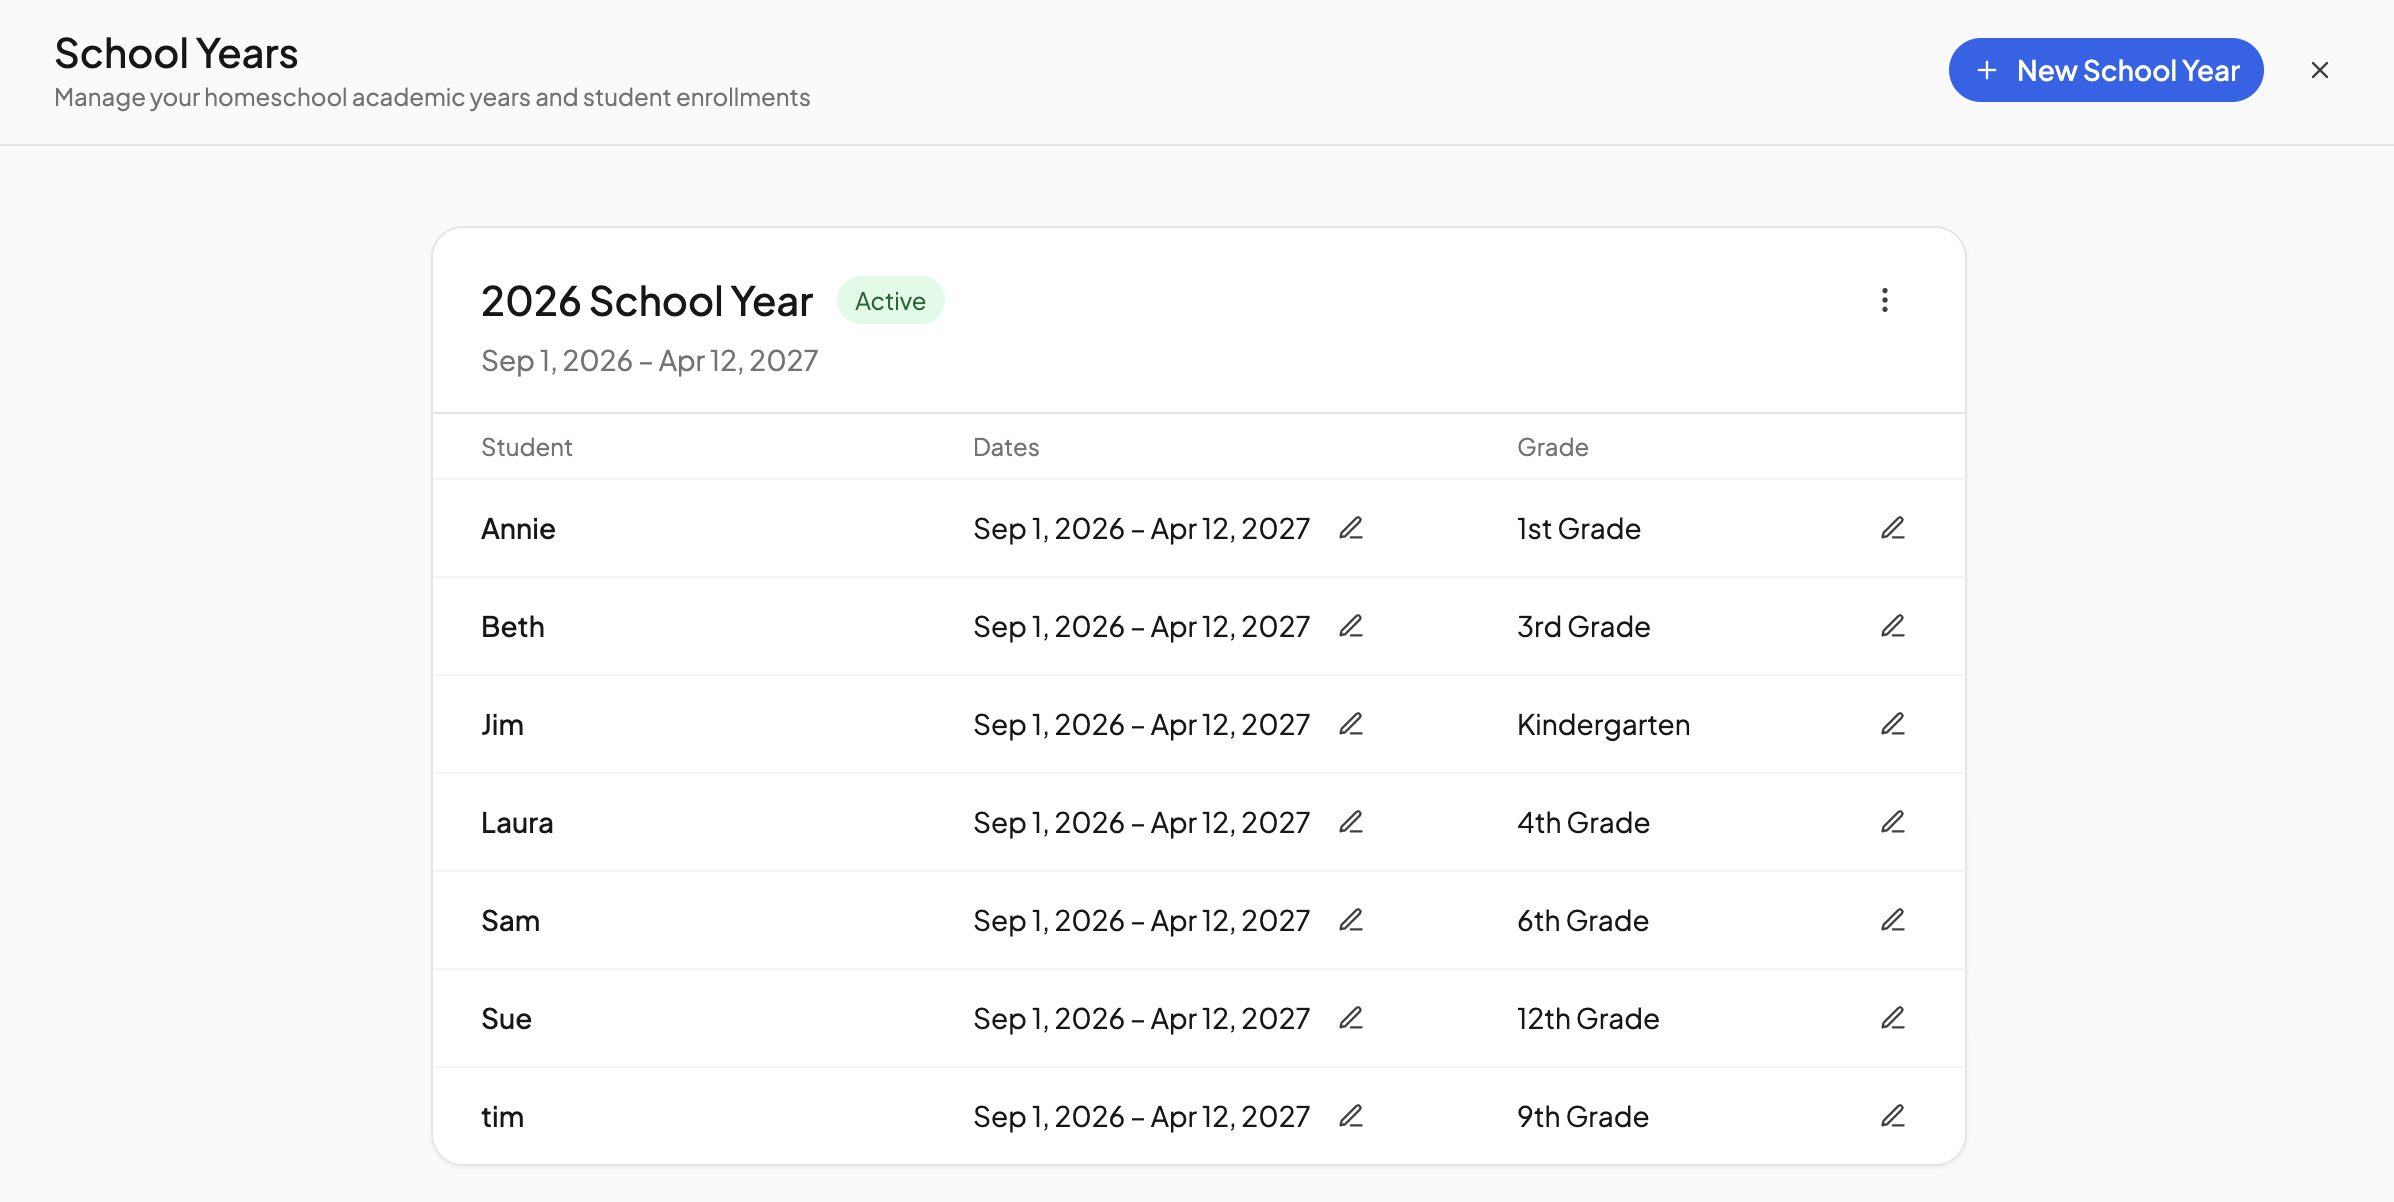
Each student's row has a Grade column.
- Click the pencil beside the grade.
- Pick a grade from the dropdown.
The list runs from Pre-K and Kindergarten through 12th Grade. Choose from this list wherever you can — it is what lets OpenSky suggest next year's grade automatically and keeps the label consistent everywhere the grade is shown.
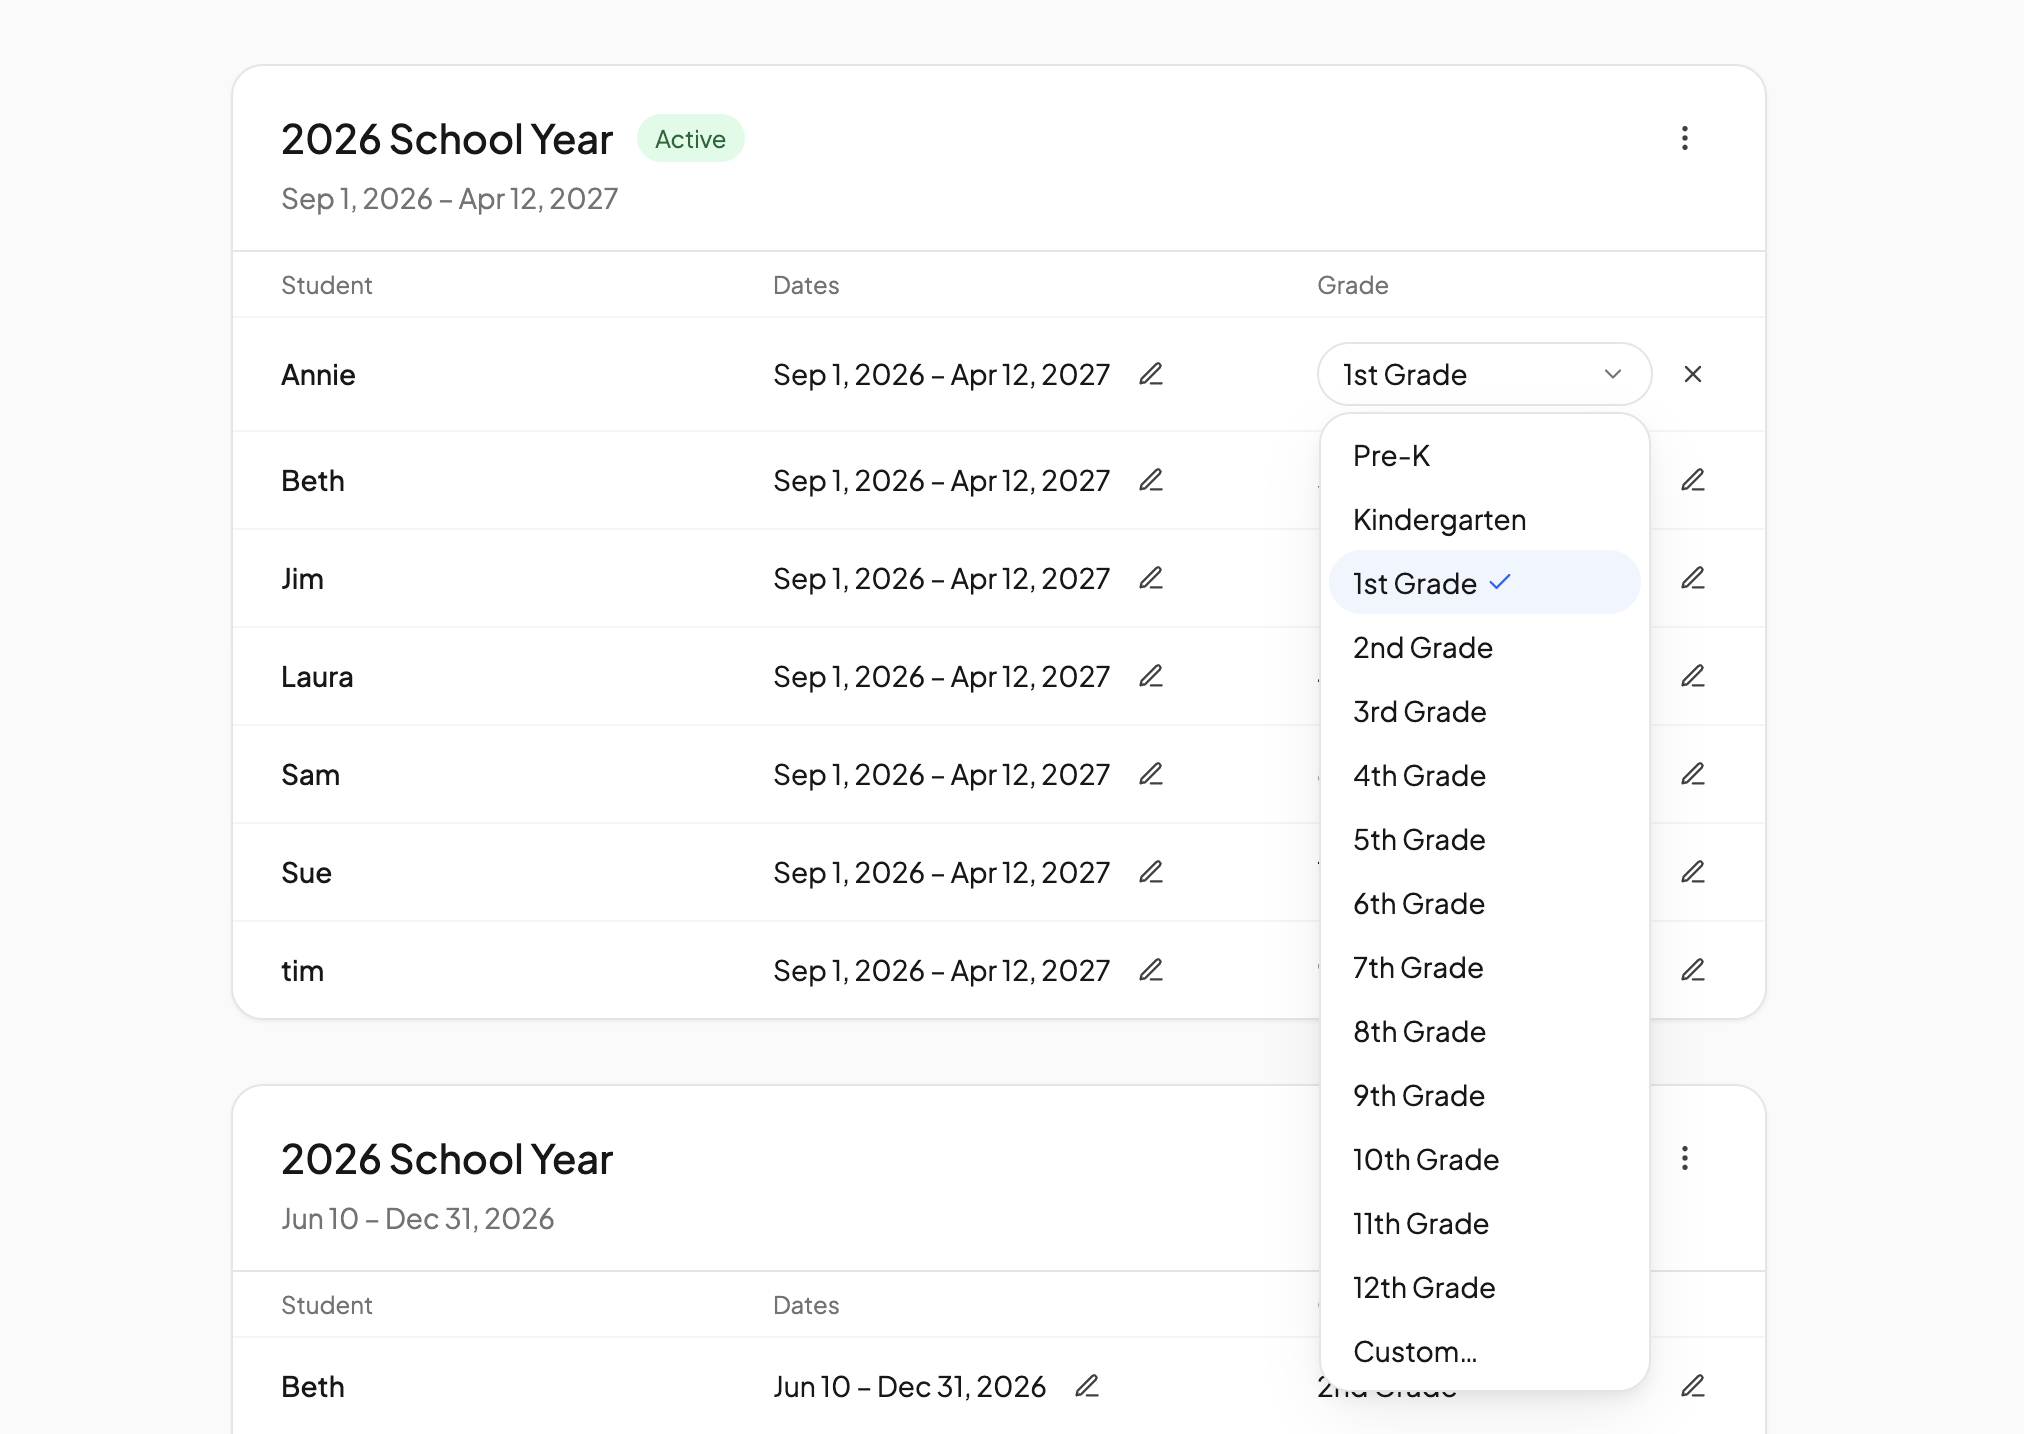
If none of them fit, choose Custom… at the bottom of the list and type your own — Pre-K 3, K Bridge, Mixed Level 9 & 10, whatever matches your family. A custom grade works everywhere a standard one does; the only thing you give up is the automatic roll-up to next year's grade.
If a student is missing from a year's card entirely, they show as a greyed-out row with an Add as 8th Grade button. The suggested grade is one step on from the grade they held in the previous year.
A note on the Dates column
By default every student follows the school year's dates, so re-dating the year moves everyone. If one student needs a different window — a later start, an earlier finish — click the pencil in the Dates column, choose Unsync, and set their own first and last day. They then show an Own dates badge and stop following the year.
Setting dates identical to the year's is not a detachment, so OpenSky puts that student back on the year's dates rather than pinning a copy. To go back deliberately, open the same dialog and choose Follow term dates.
Start the next school year
When a year ends, you do not build the next one student by student.
- In School Years, click New School Year.
- Give it a name and dates.
Every student is enrolled in the new year and moved up one grade automatically — 7th Grade becomes 8th Grade.
Two cases get no grade and need setting by hand: a student on a custom grade, because there is no standard list to count forward on, and a student finishing 12th Grade, because there is nothing after it.
The new year starts empty of courses. Assigning them is the next step.
Put courses into a grade
This part happens on the gradebook, per student.
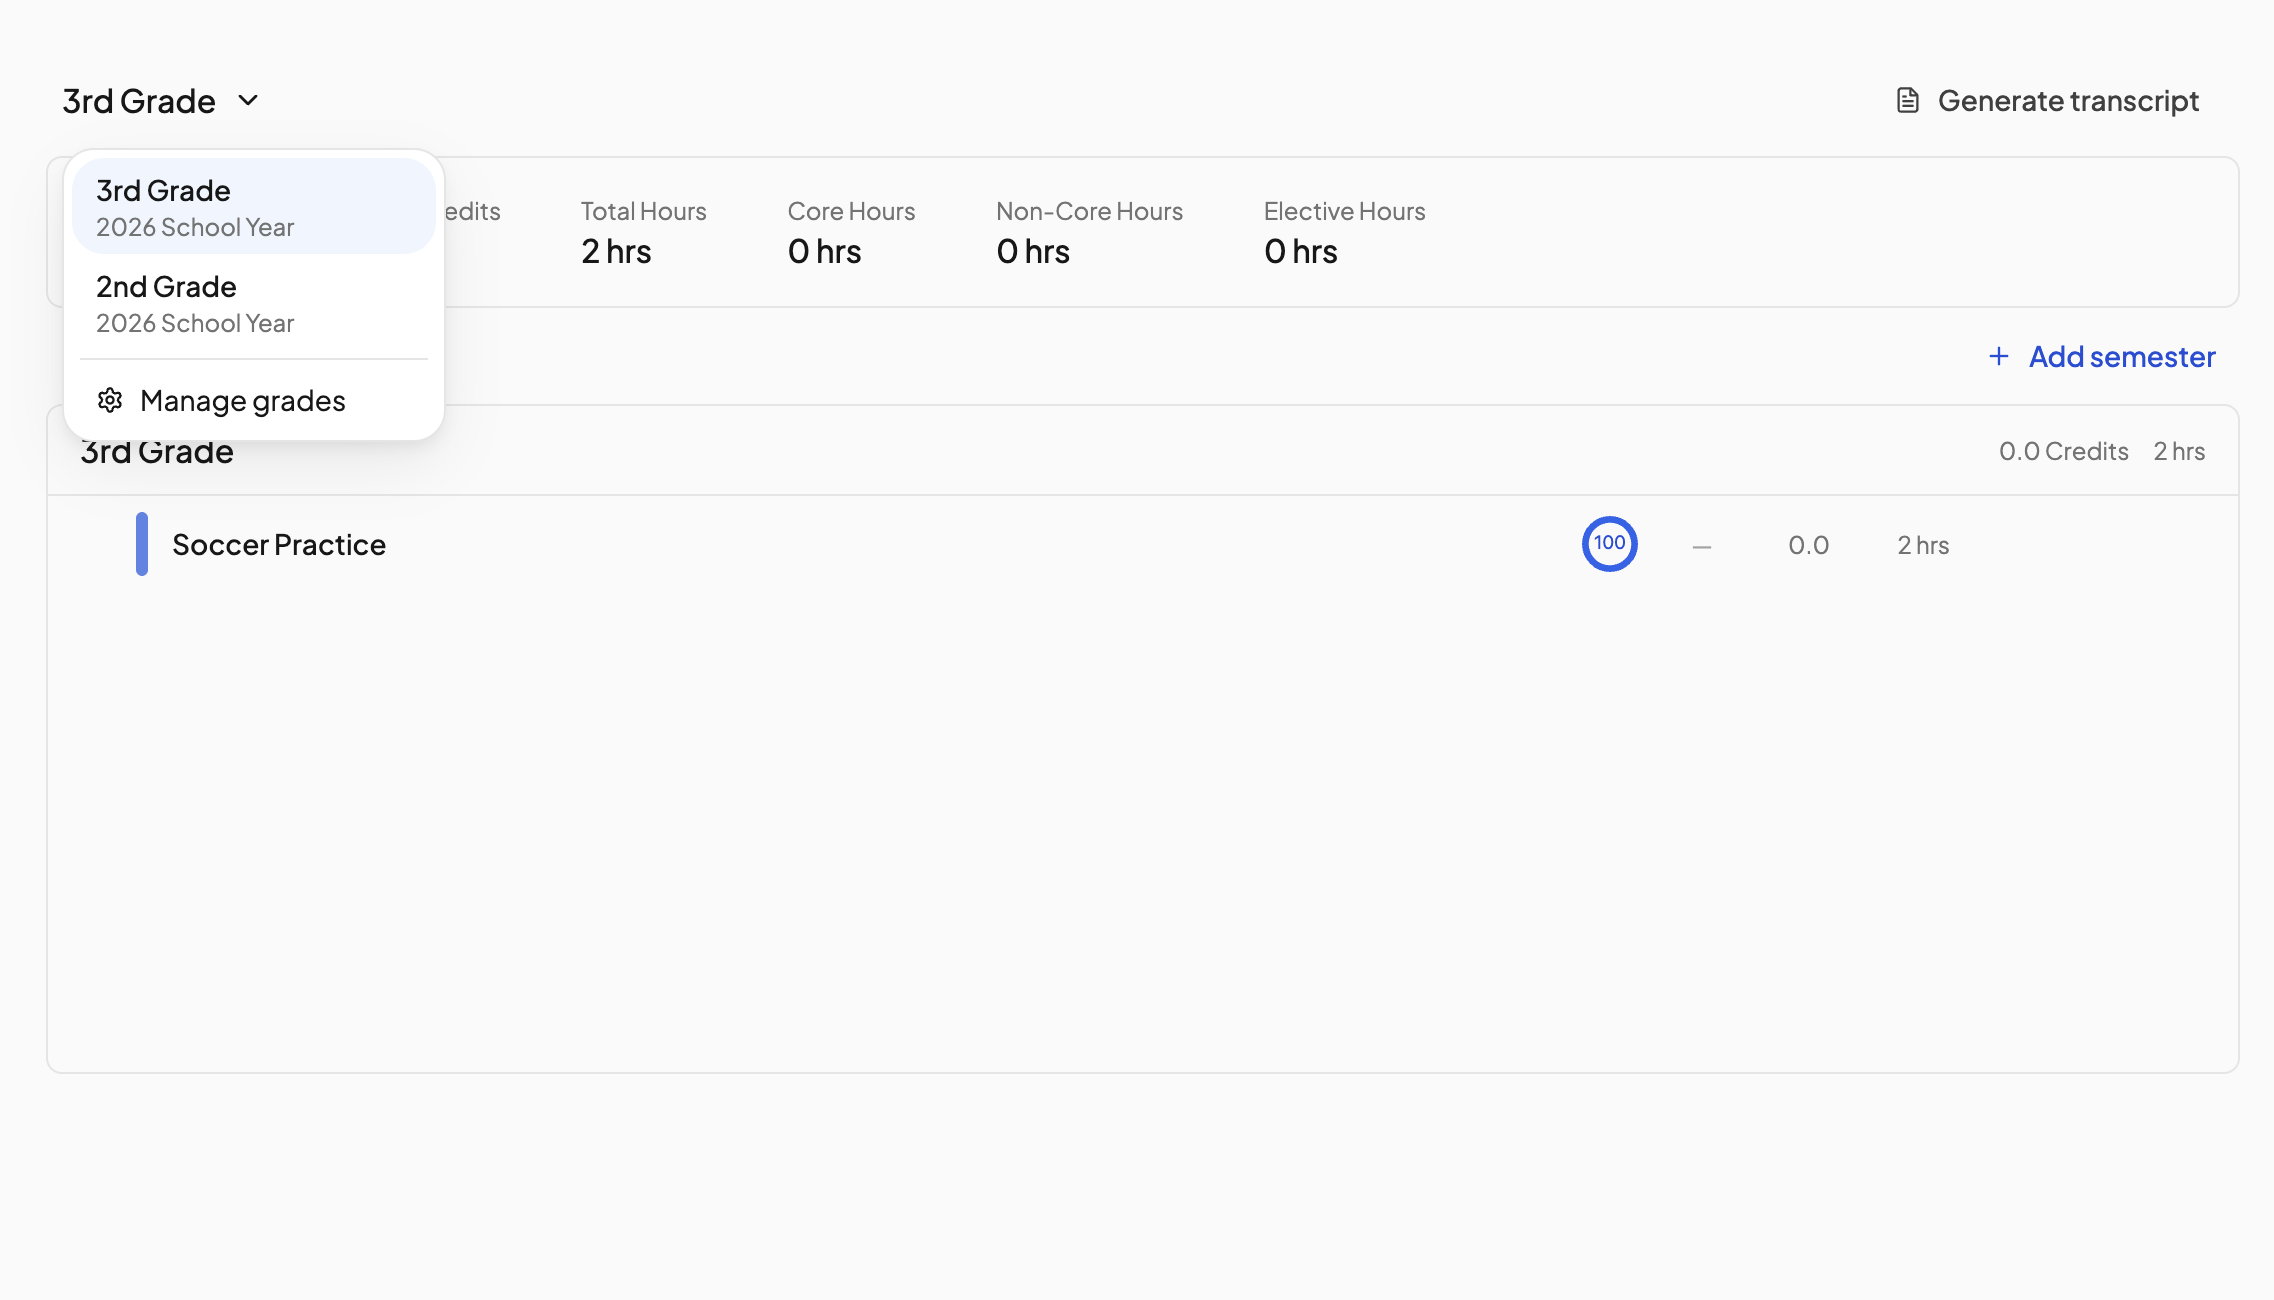
- Go to a student's Gradebook.
- Click the grade name in the header — it is a dropdown.
- Pick a grade to switch the gradebook to it, or choose Manage grades at the bottom to open the organizer.
The organizer is titled the student's name followed by Grades and does exactly one job: it puts courses into grades and moves them between grades. School years, grade levels and dates are not edited here — those stay on the calendar, so there is only ever one place that owns them.
Assign an unassigned course
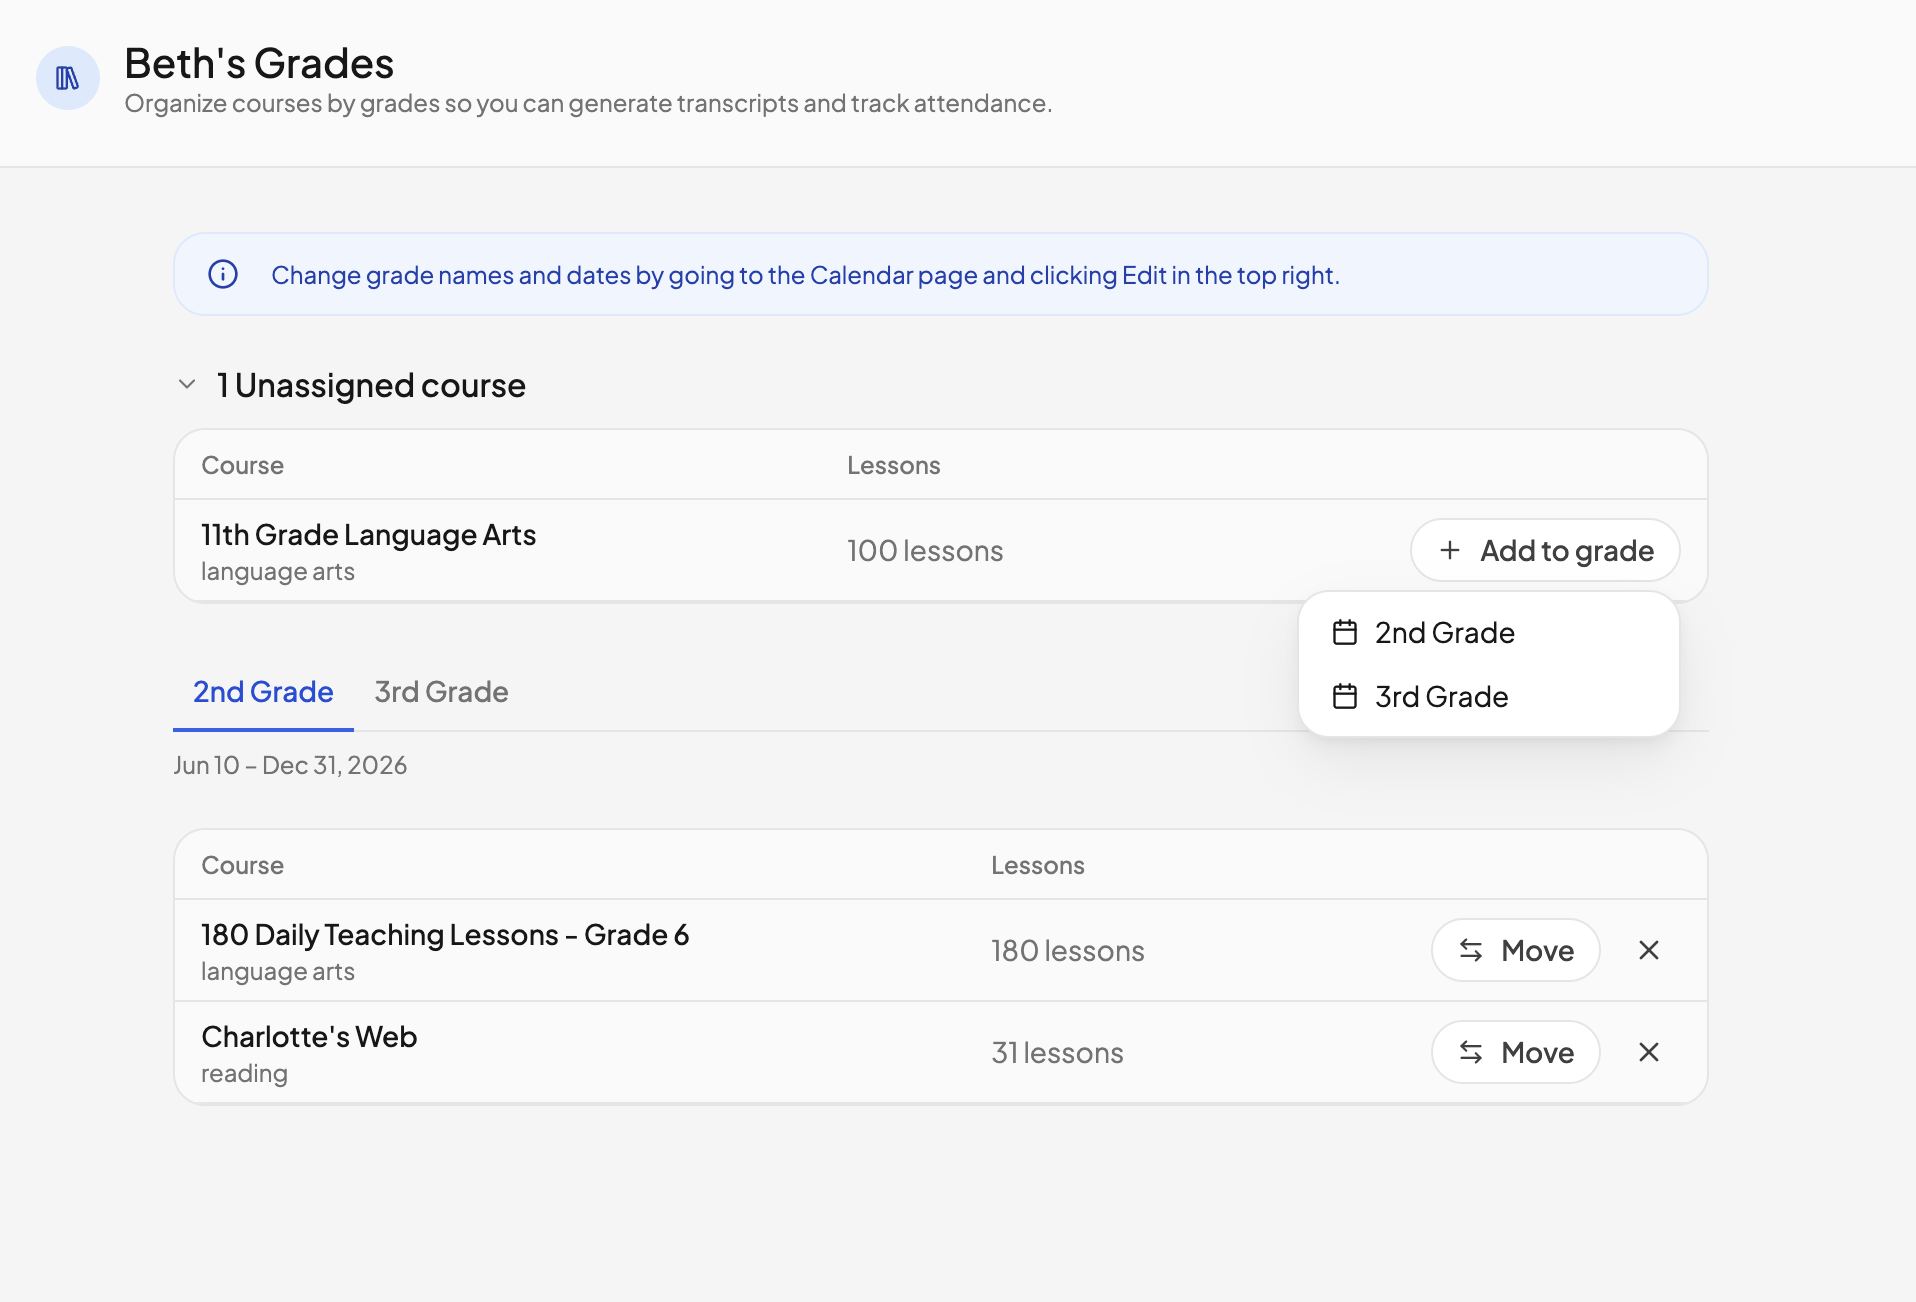
At the top you will see N Unassigned courses — every course this student is enrolled in that does not yet belong to any grade. Click it to expand the list.
- Find the course.
- Click Add to grade.
- Choose the grade from the menu.
The course disappears from the unassigned list and lands in that grade.
Move or remove a course
Below the unassigned list is a row of tabs, one per grade, in order from earliest to latest, with that grade's dates underneath. The table shows the courses in the selected grade and how many lessons each has.
- Move — click Move on a course's row and pick a different grade. Because a course lives in one grade at a time, this takes it out of the current one.
- Remove — click the ✕ on the row. The course goes back to the unassigned list.
Removing a course from a grade does not delete it or stop it being taught. Its lessons still appear on the checklist exactly as before. All you have changed is which year's records it counts toward.
If you open the organizer and see "Add a school year from the Calendar first", there are no grades to assign to yet — go set up a school year first.
A good order to do this in
For a new school year, working in this order means nothing is left half configured:
- On the Calendar, create the school year and set it active.
- Check each student's grade on that year's card.
- Enroll students in their courses for the year.
- On each student's Gradebook, open the grade dropdown → Manage grades, and assign the new courses to the new grade.
Once that is done, generating a transcript is a matter of picking which grades to include.
Need more help?
Reach out any time at support@openskyplanner.com and we will be happy to help.