Enrolling a student in a course takes just a few minutes. You add the course, tell OpenSky how you want to schedule it, and then fill in the lessons. Here is the full walkthrough.
Step 1: Add the course
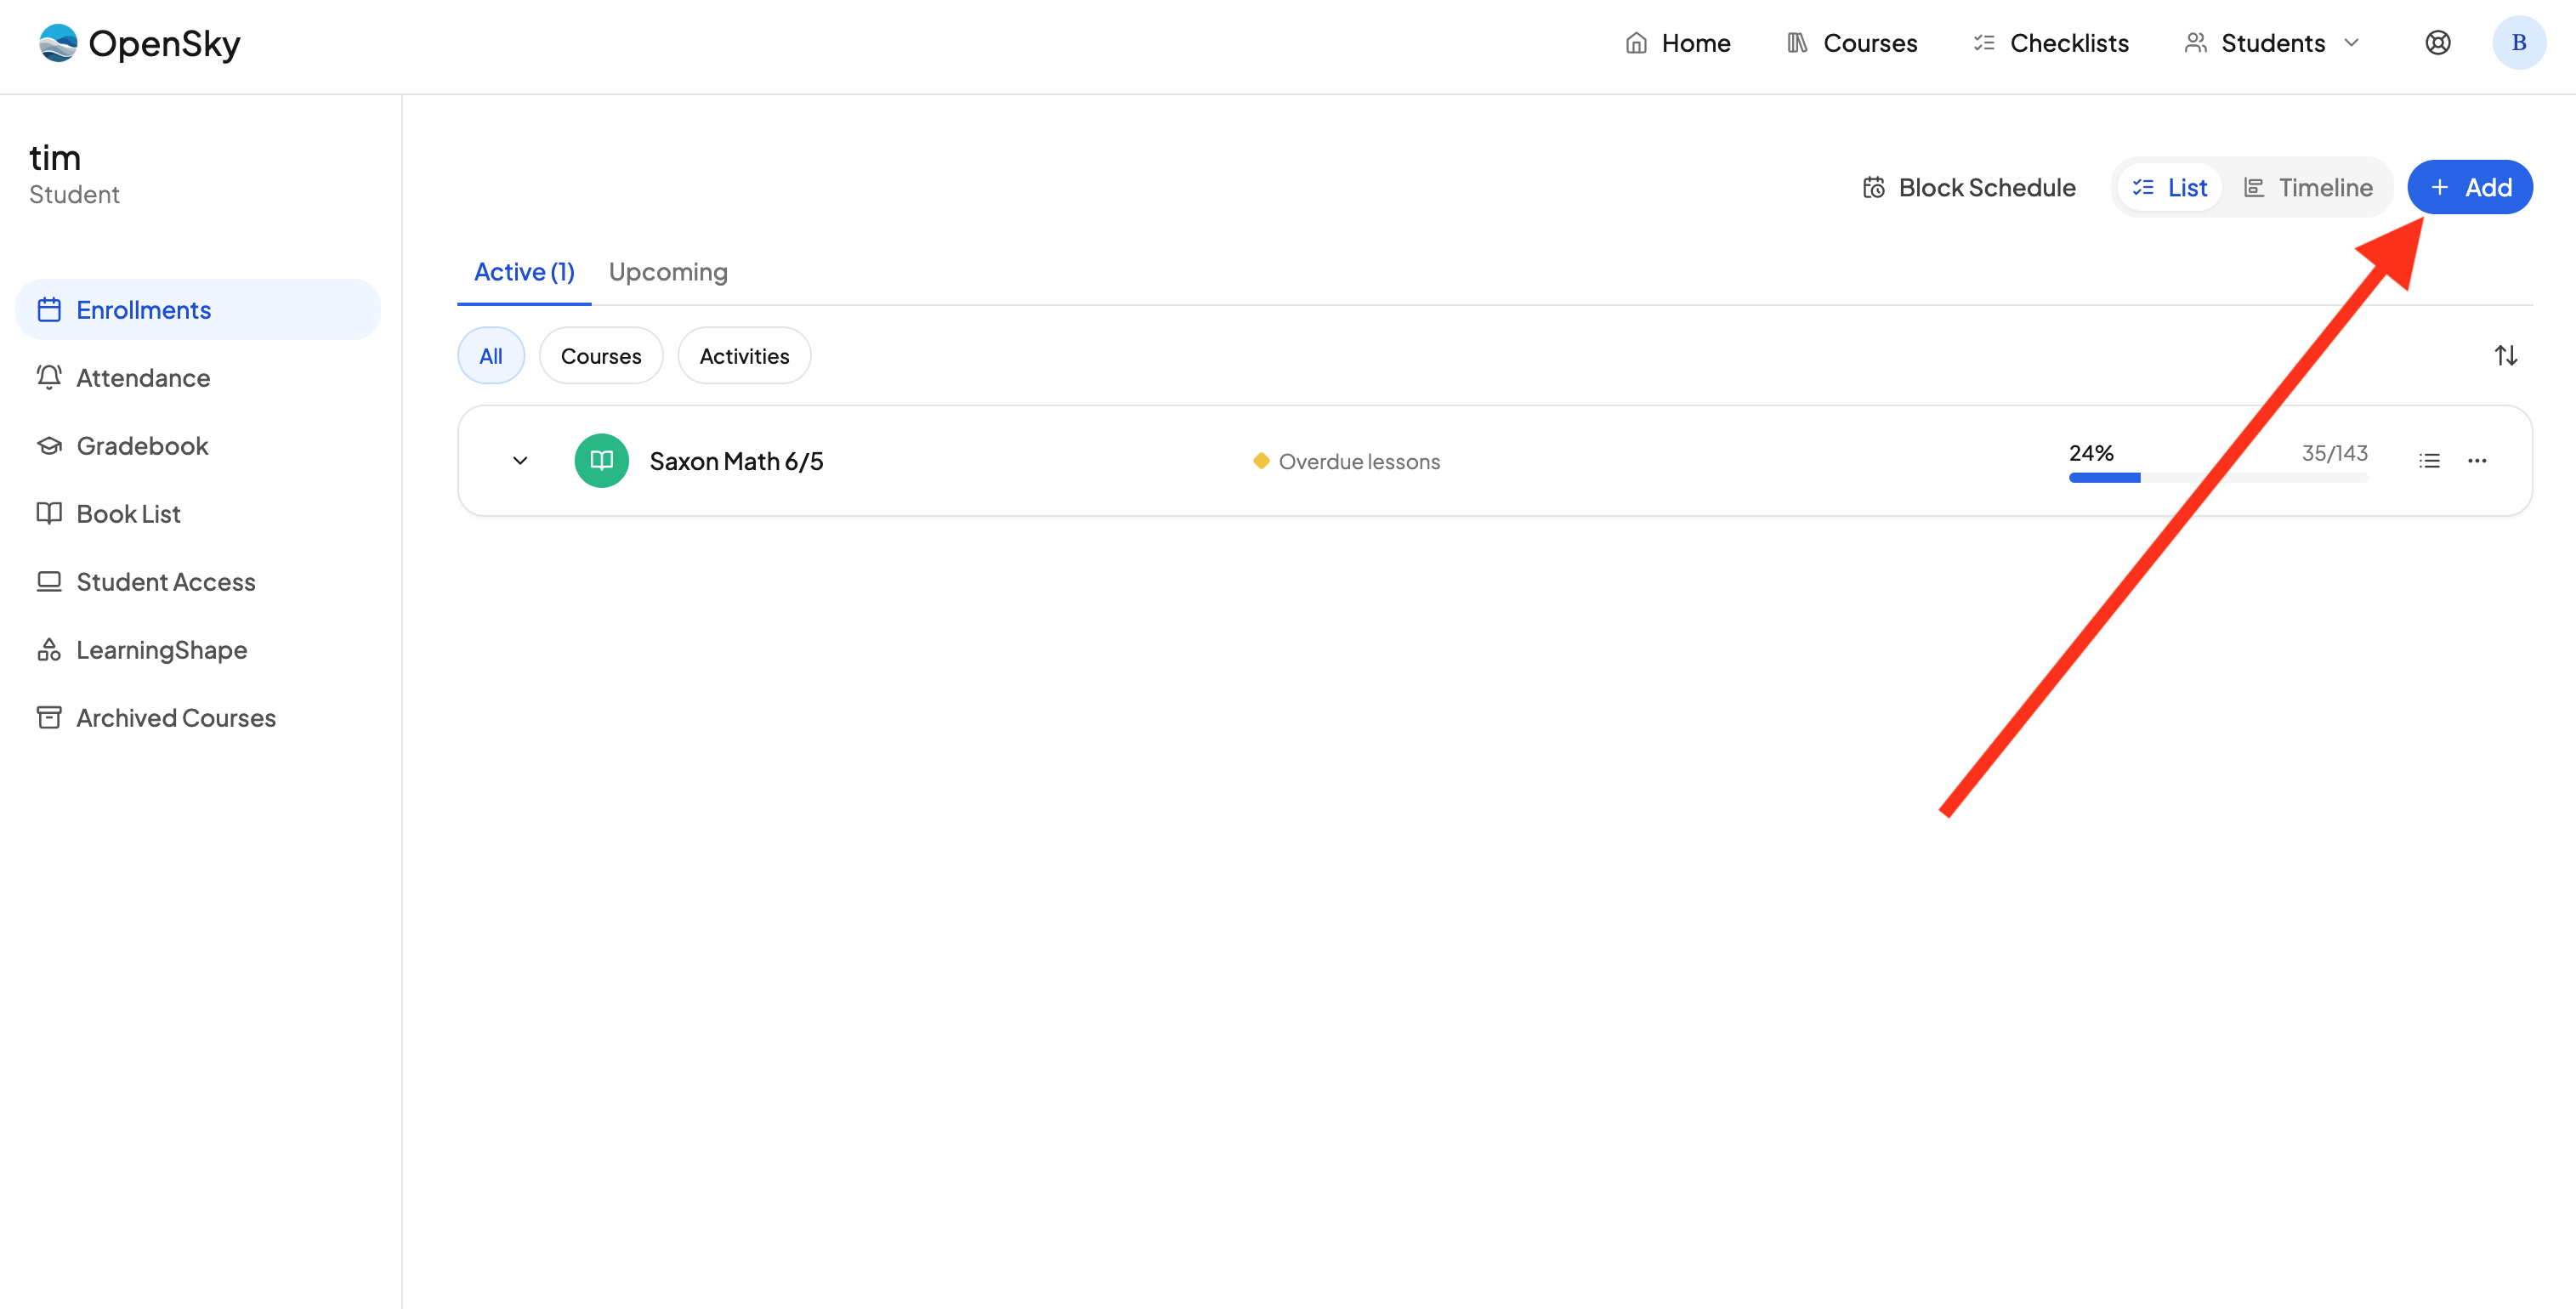
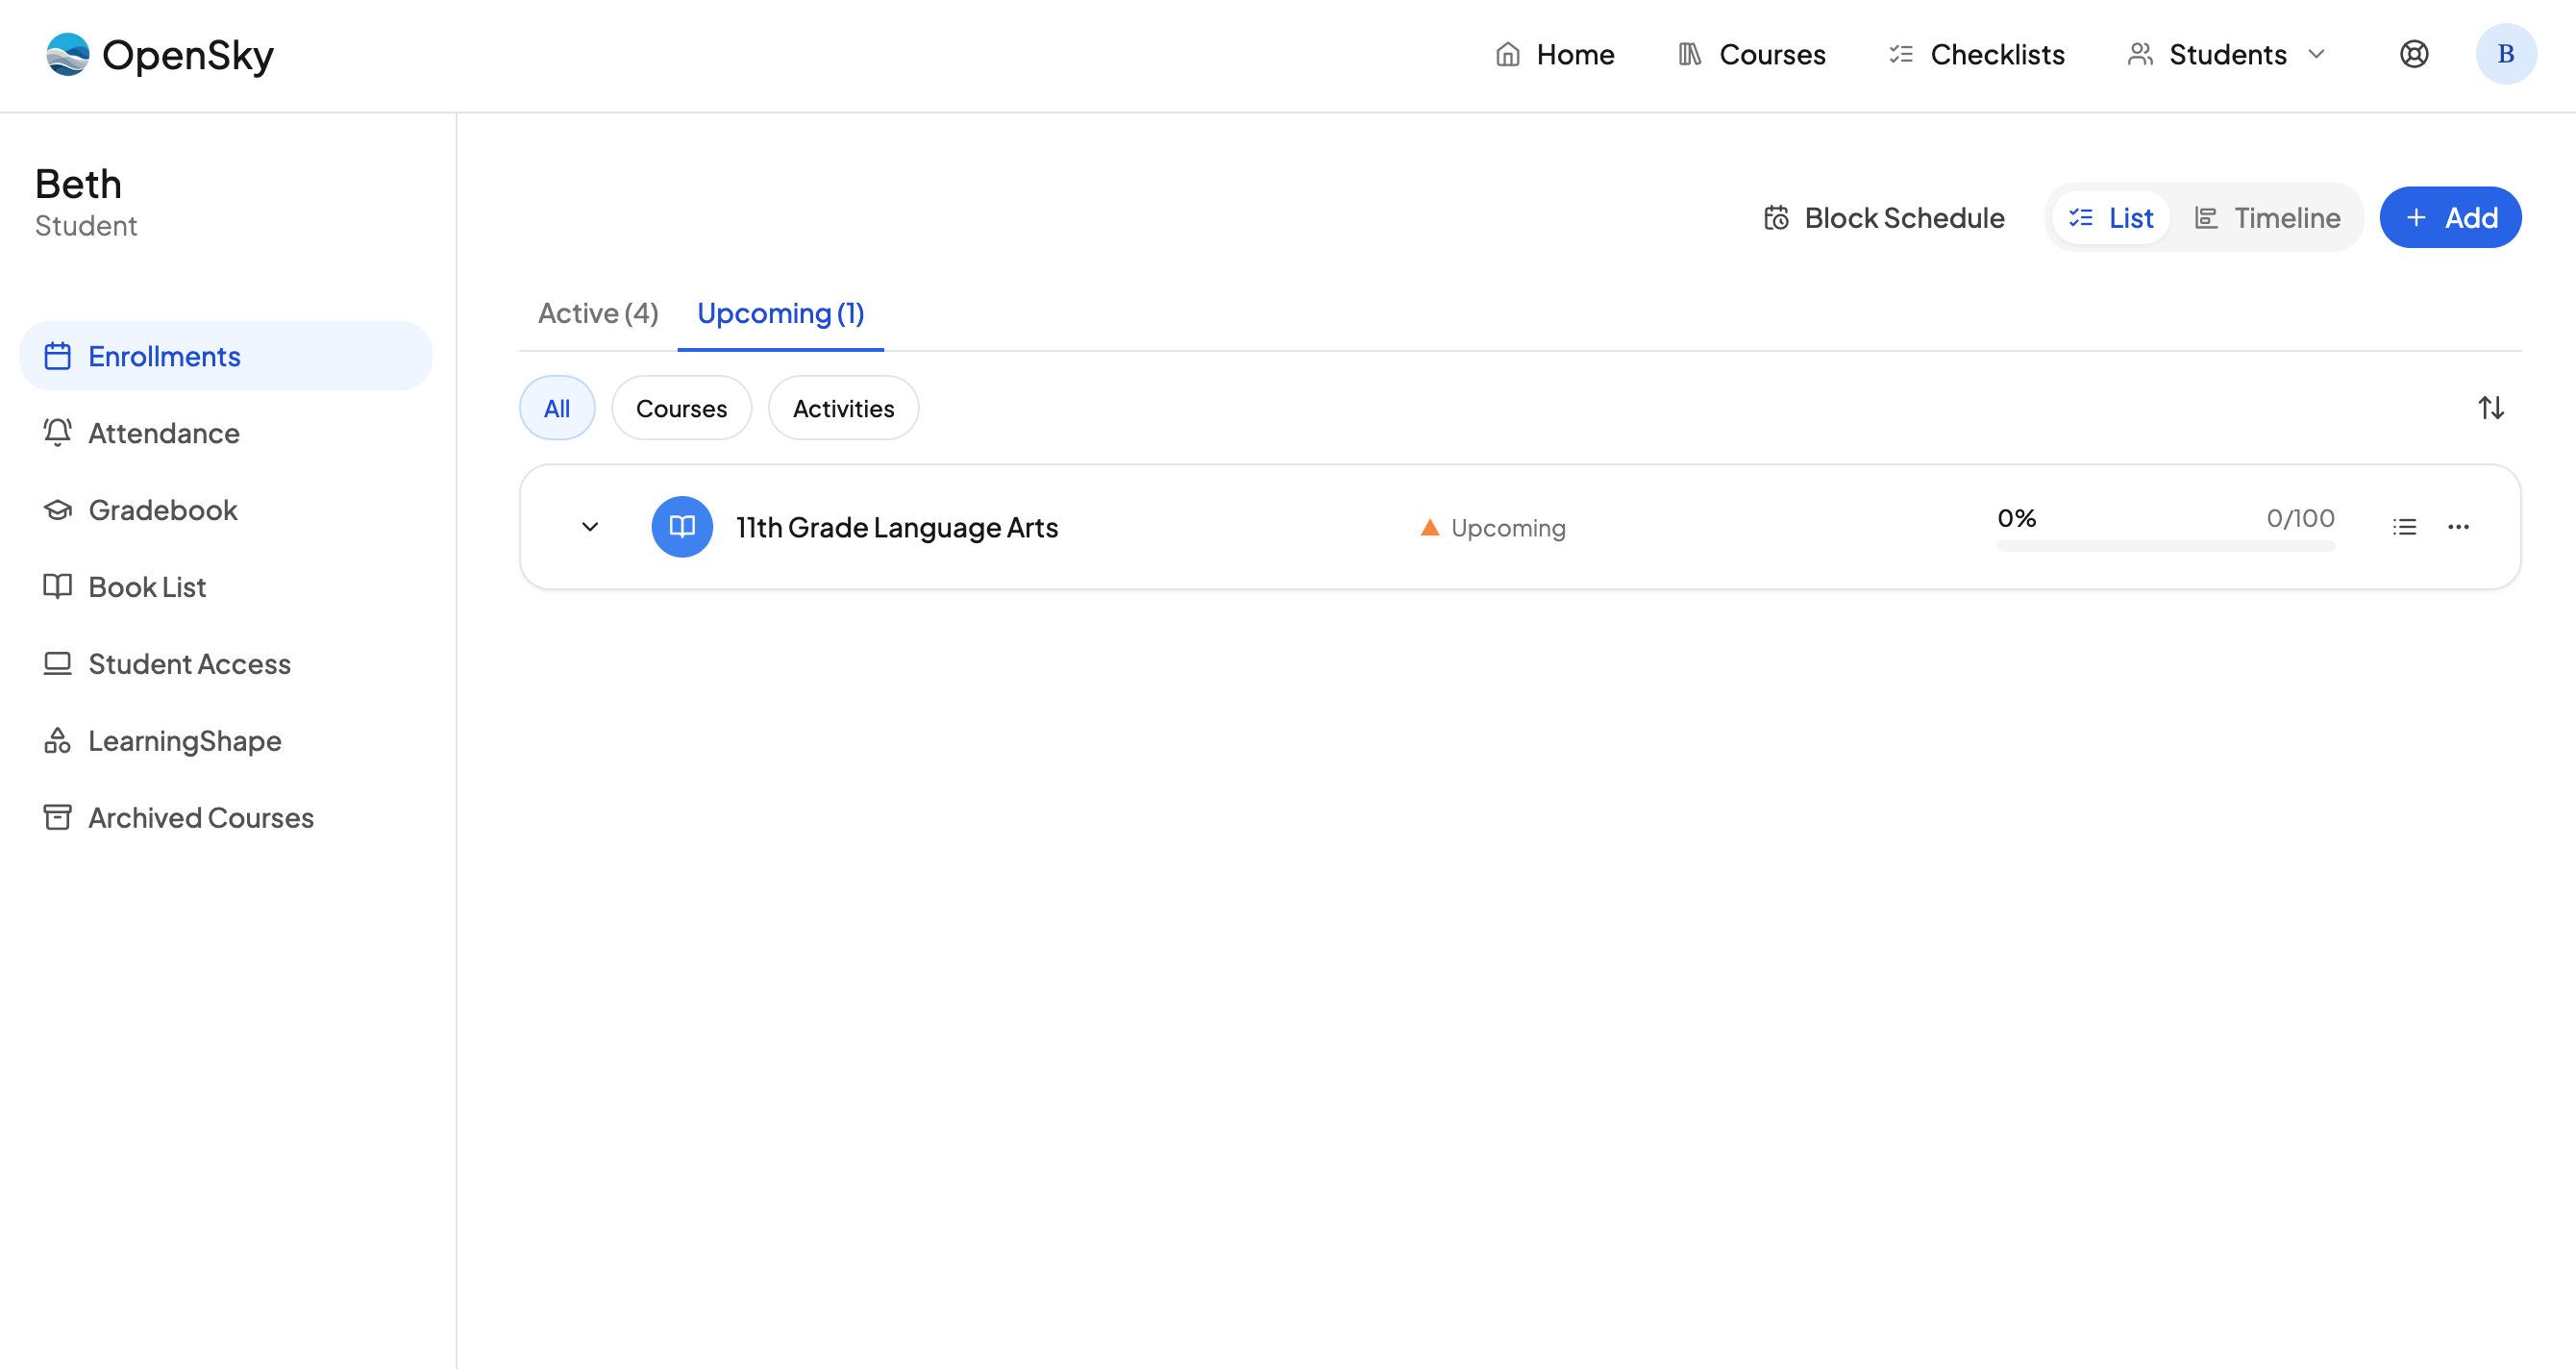
- Go to the student dashboard.
- Click Add.
- Type or dictate what you want to add. For example, you can say "Saxon Math 5/6 every Monday, Tuesday, Wednesday." You can add multiple courses at once this way.
- If you prefer, you can also skip dictation and just hit Add manually.
Step 2: Fill in the details
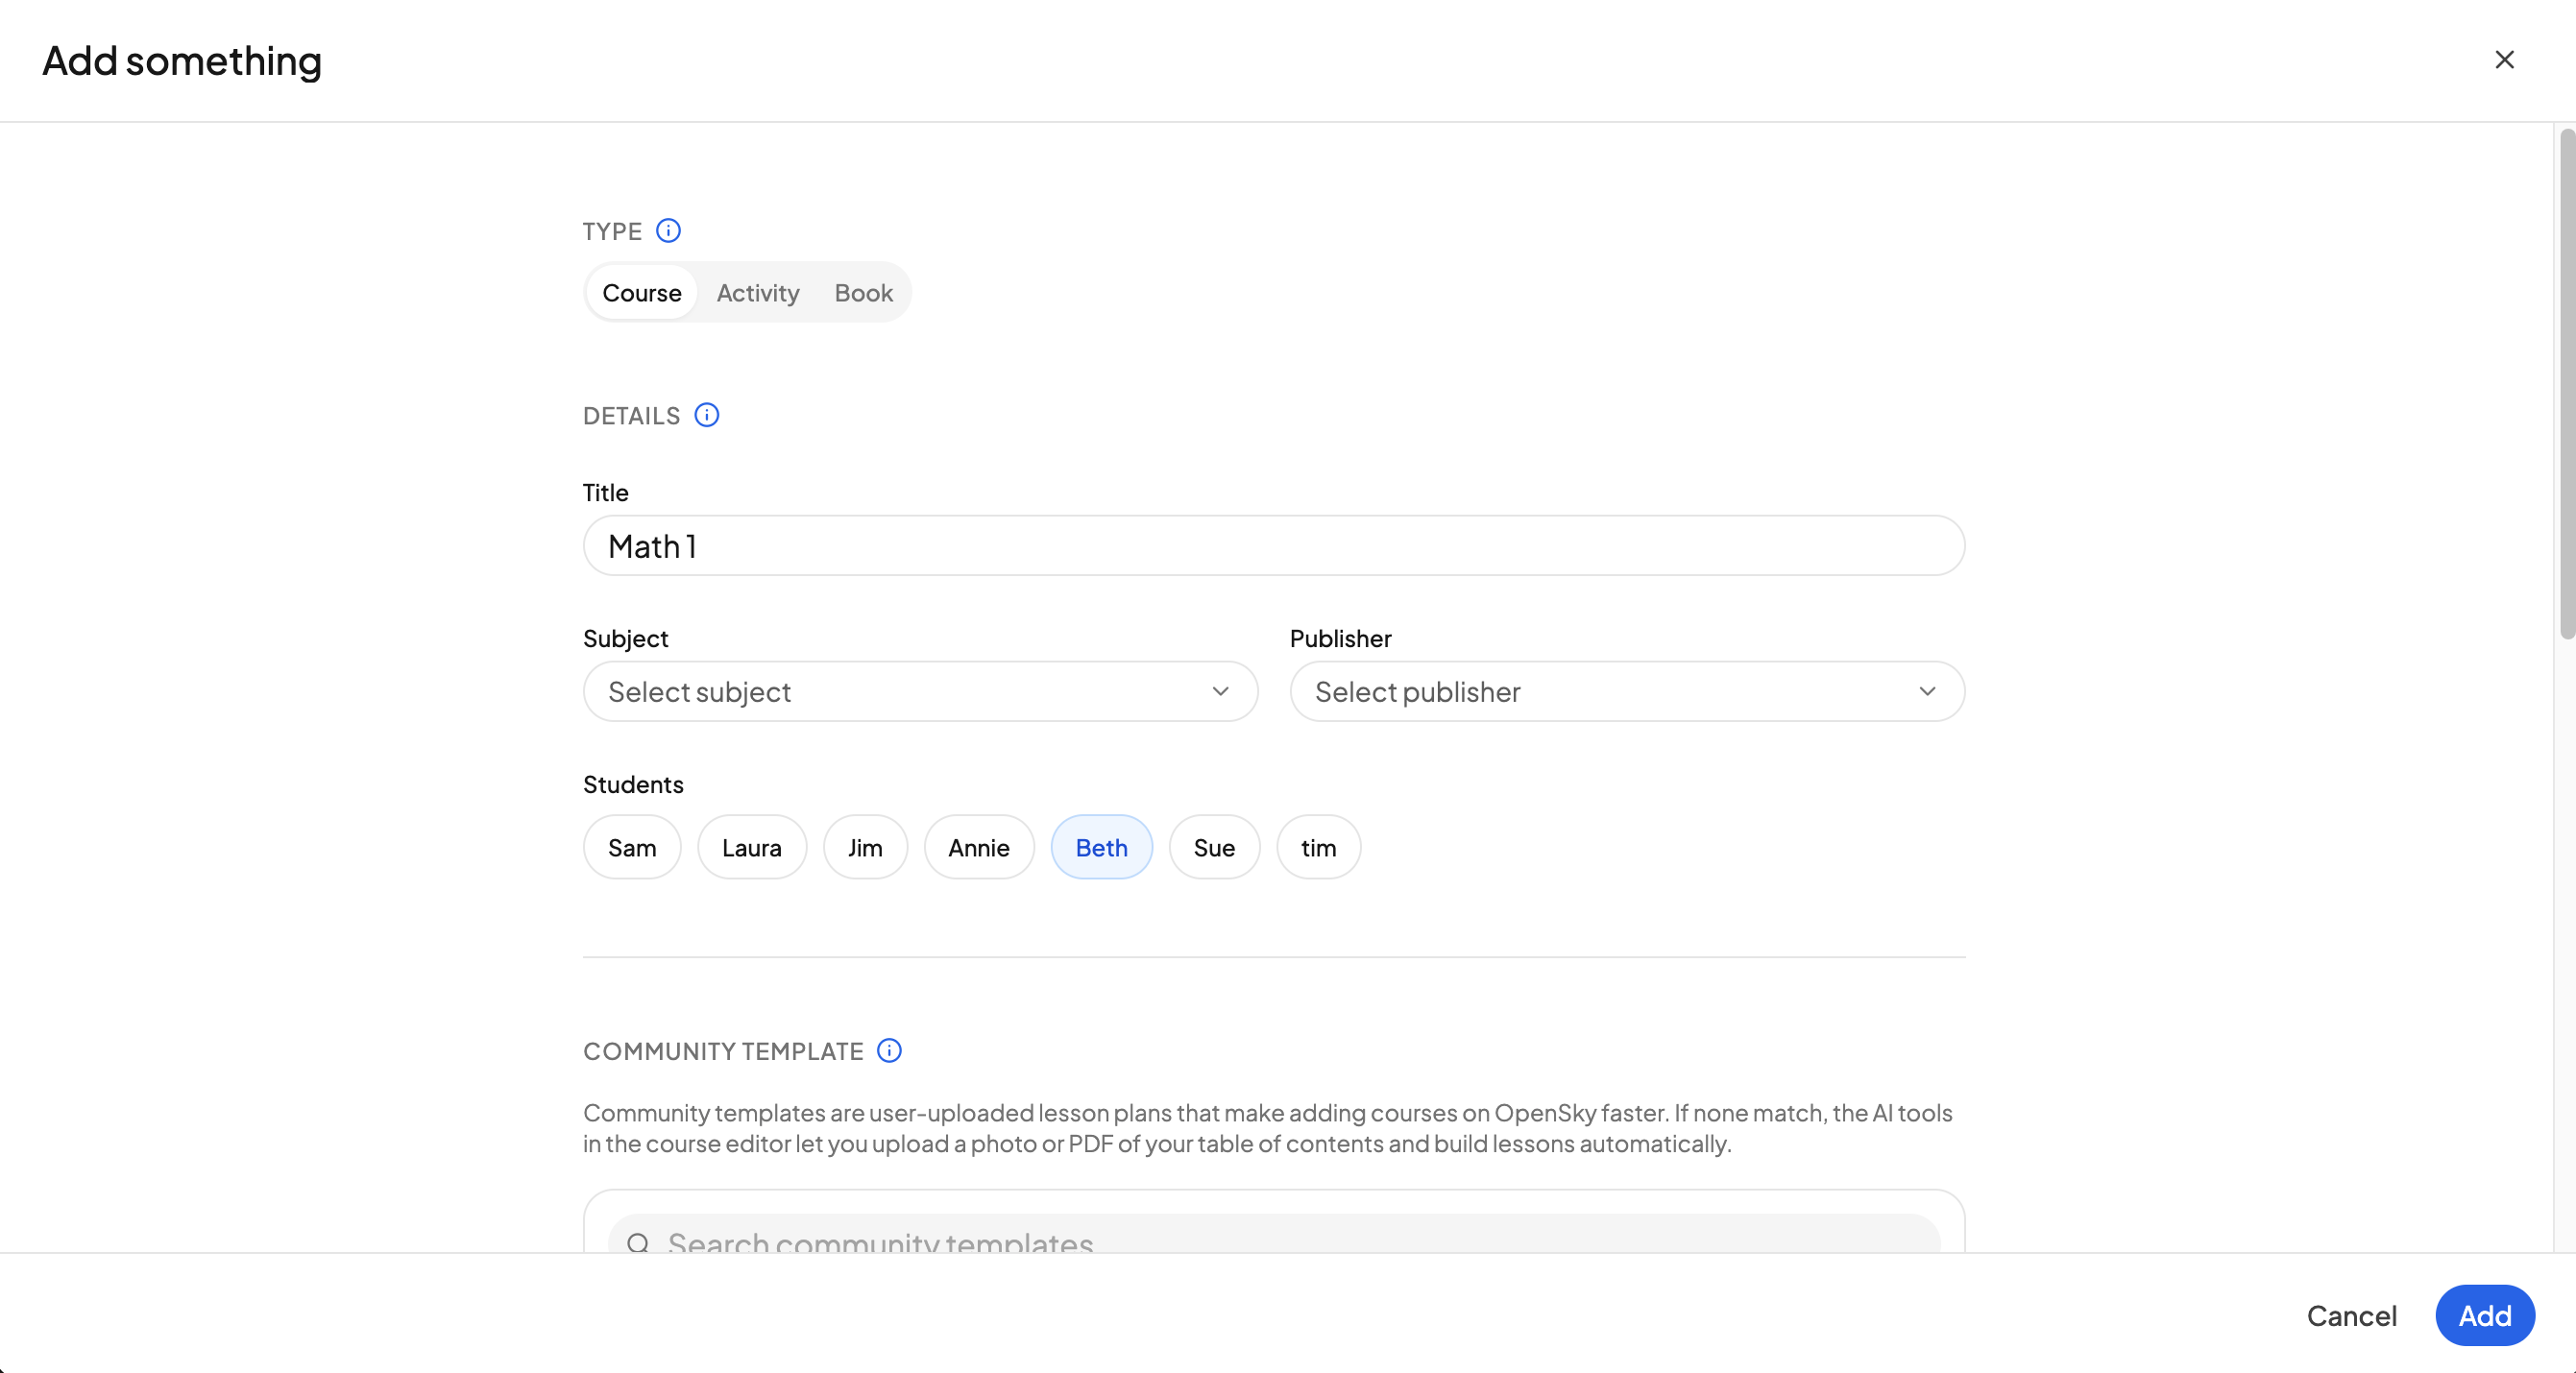
After you add a course, you will be asked for a few more details:
- Family mode. If you enroll multiple students in the same course, you have the option to turn on family mode. With family mode on, when one student marks a lesson complete, it is marked complete for all students.
- Scheduling. Choose which days you want to teach the course and set the start date.
- Cadence. Pick Daily lessons to assign individual lessons to each teaching day, or Weekly lessons to give the course one lesson that spans the whole week — see Using Weekly Lessons.
- Pacing. For daily lessons, pick how you want to pace the course, either Fixed pace or Finish by deadline.
- Books. You can add books to the course if you plan to read them along the way. These will appear in your book list.
Once that is done, the course will appear in the student's course list.
If you are picking up a curriculum you already started, use your real start date here and then see Enrolling in a Course That's Already in Progress to tell OpenSky which lesson you are on.
Step 3: Open the course editor
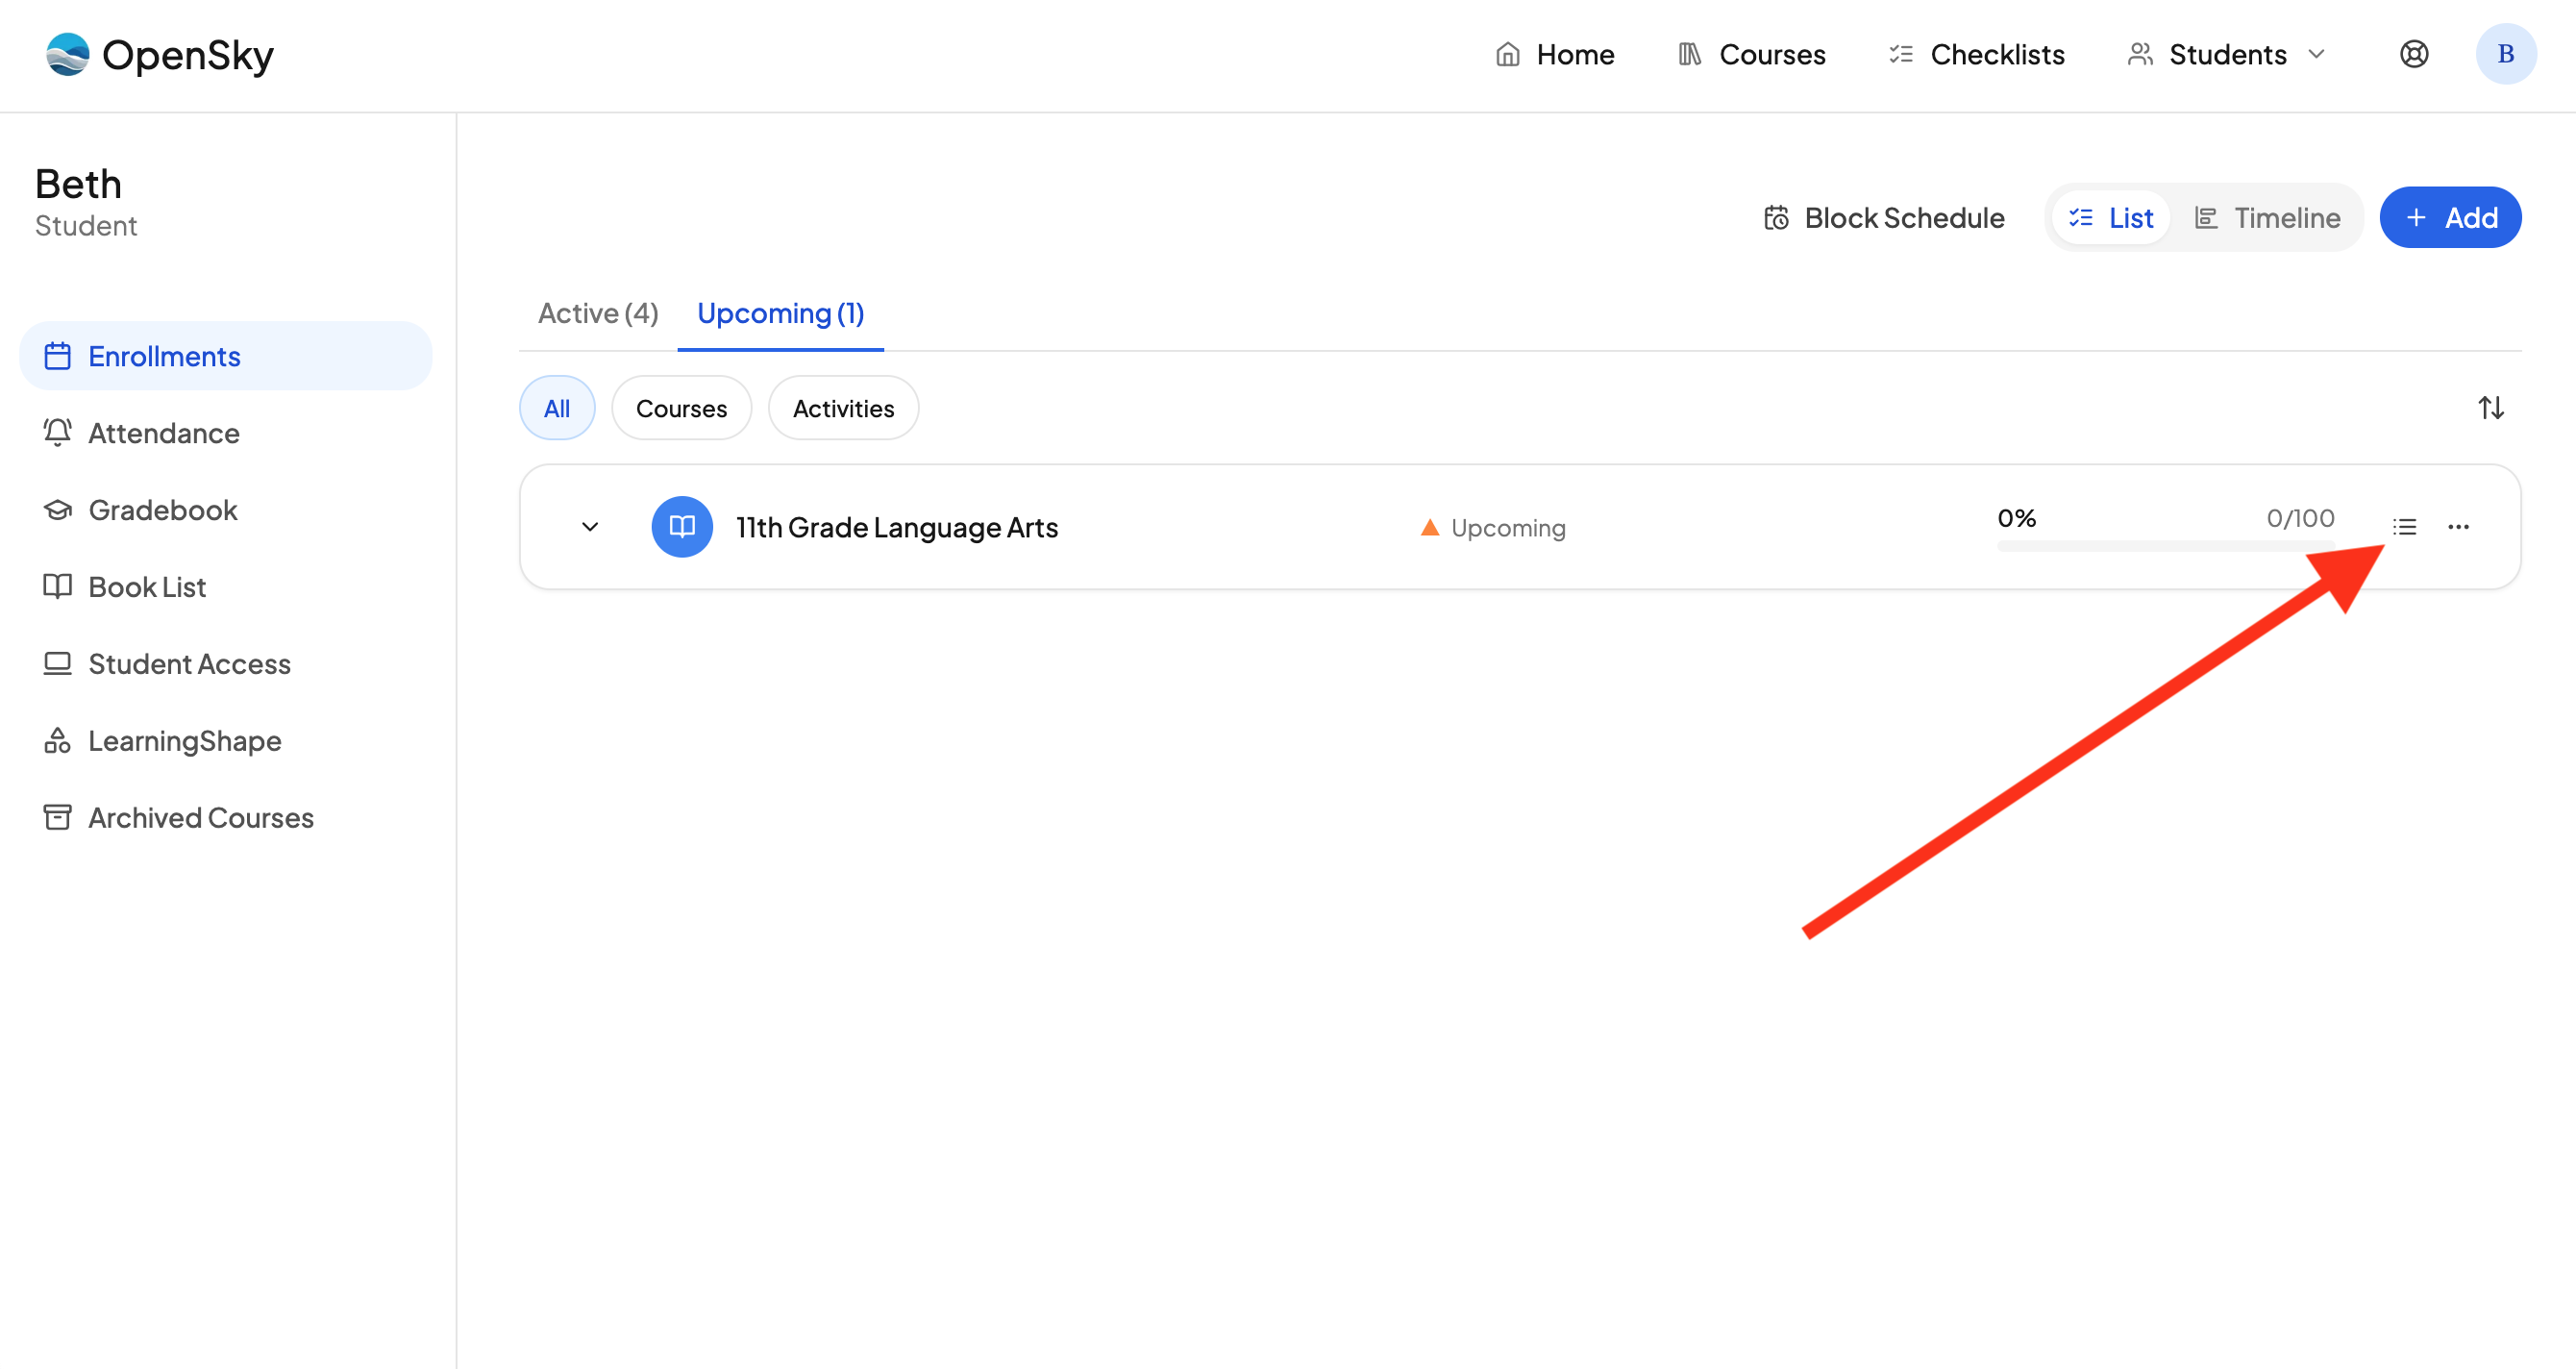
From the student's course list, click the lesson list icon on the course, or open the more menu and hit Edit Lessons. This opens the course editor.
Step 4: Add folders and lessons
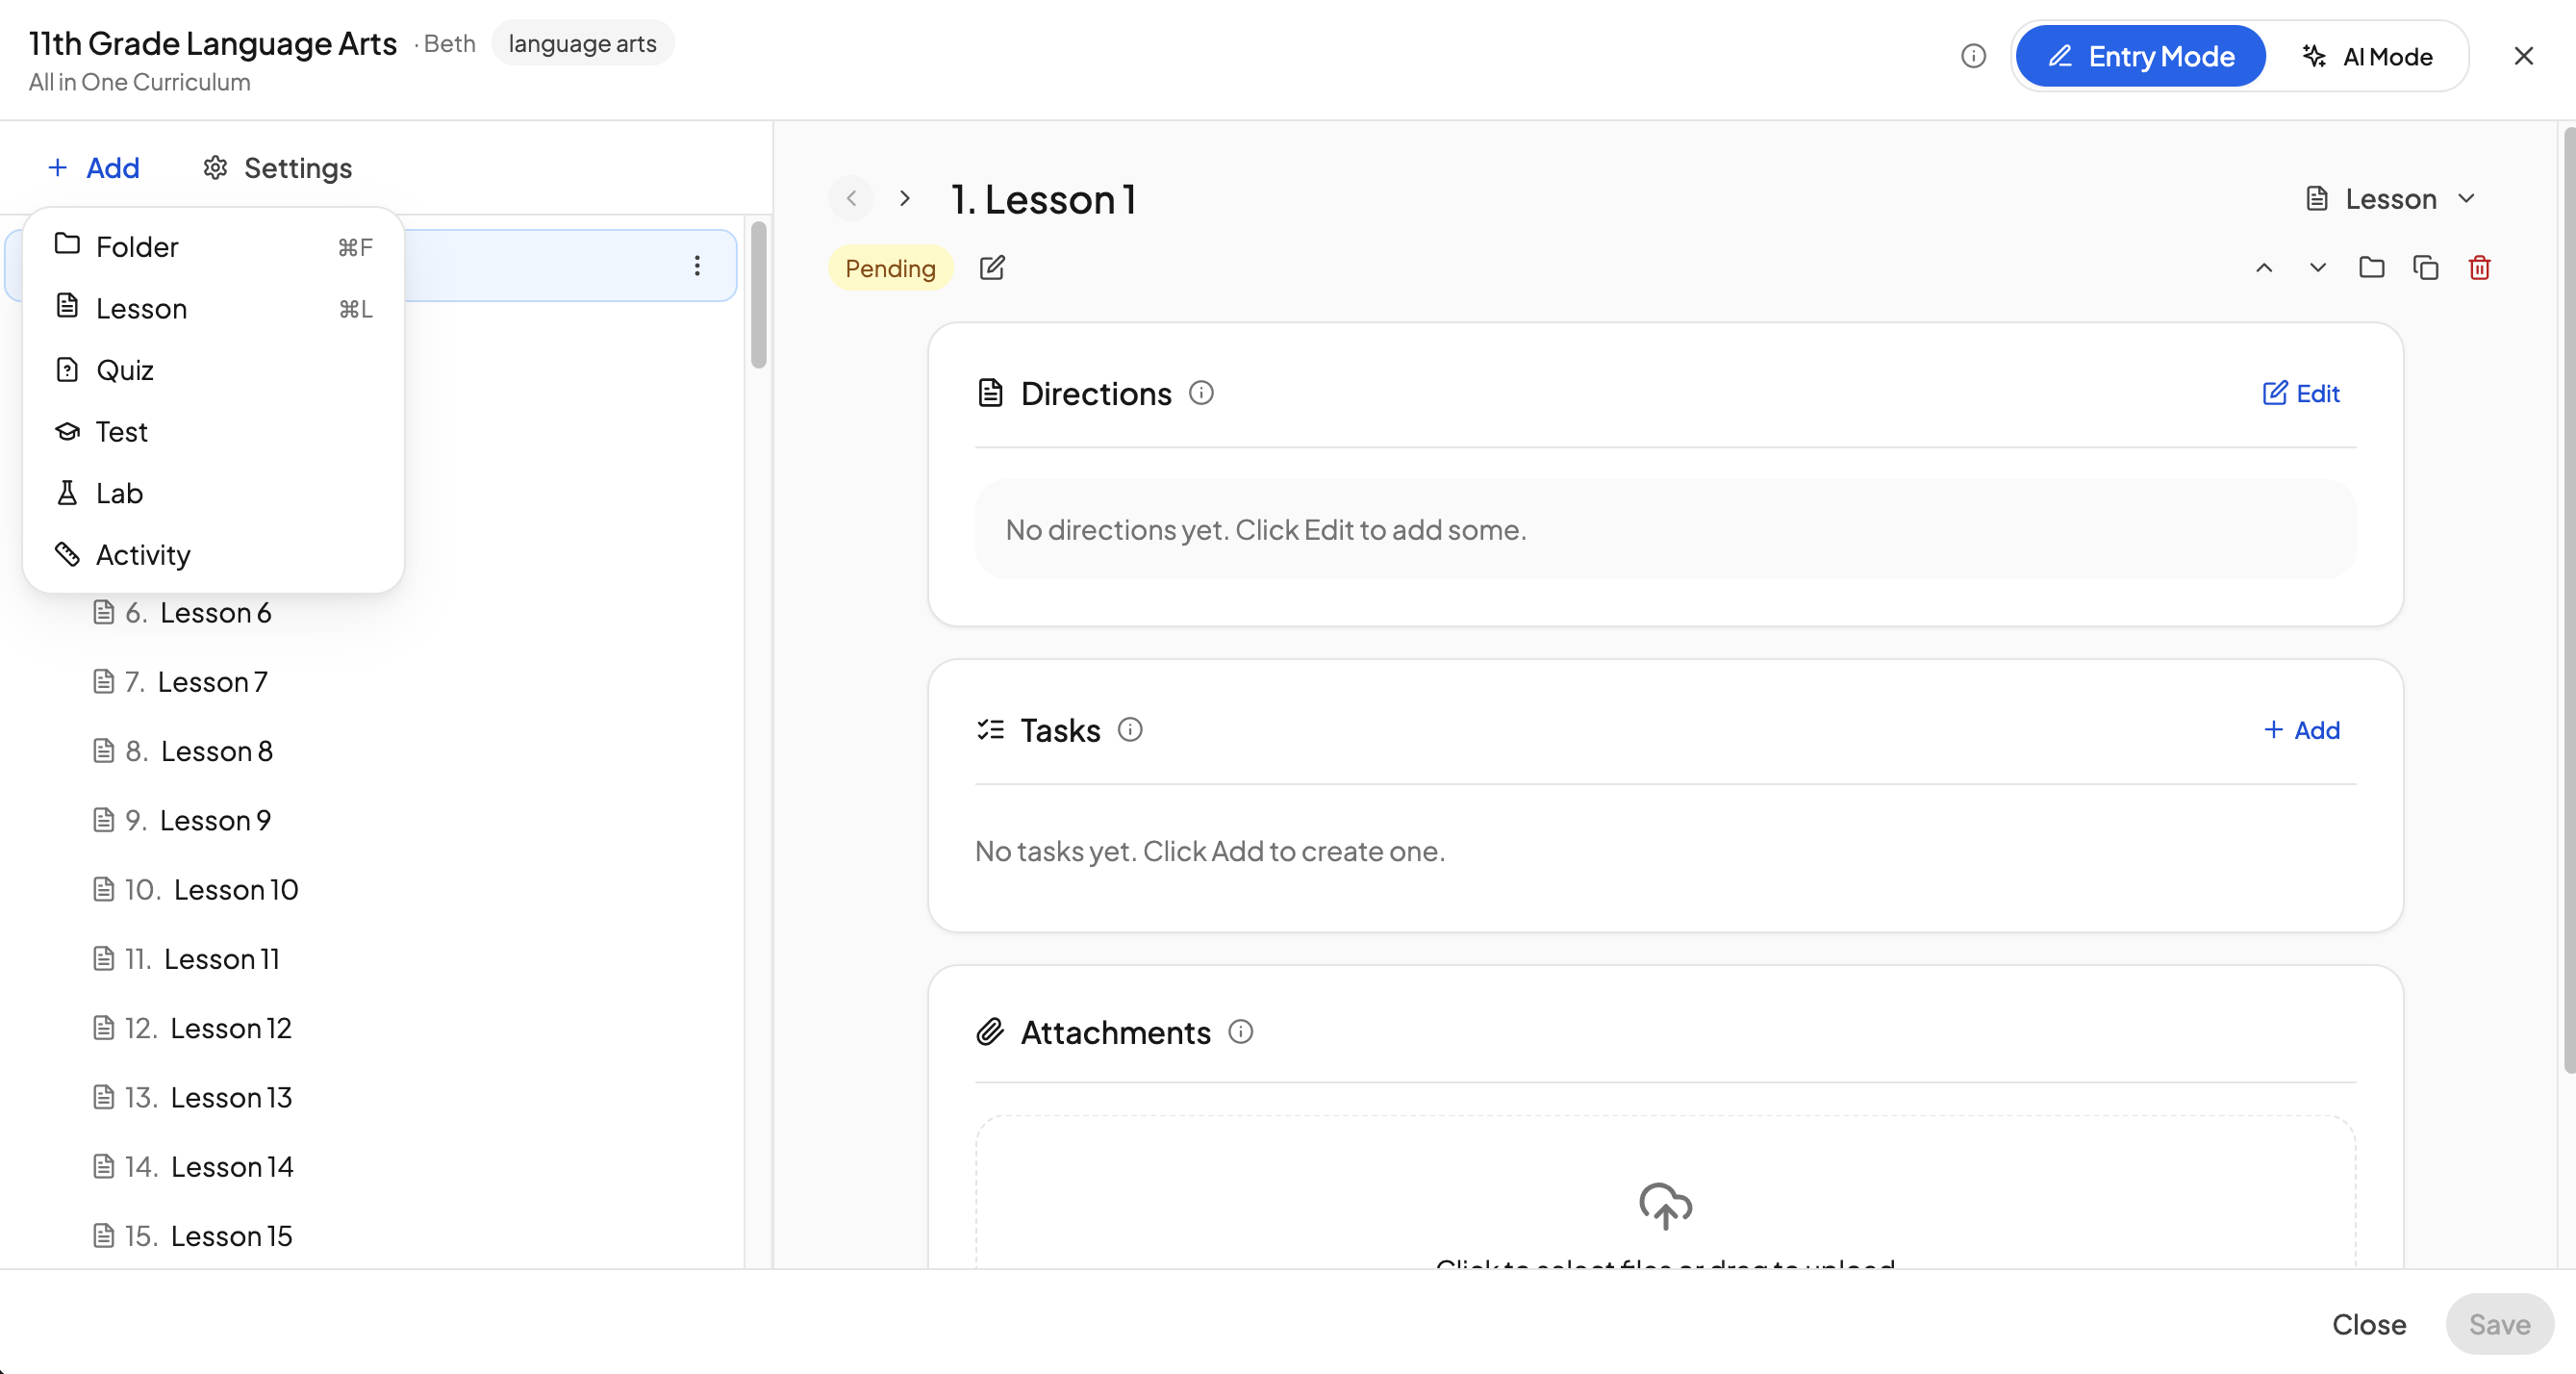
In the course editor you can add folders and lessons. Lessons are what get individually scheduled. Each lesson can include:
- Directions. This is what the student sees when they open the lesson.
- Subtasks. Subtasks have to be completed before the lesson can be marked complete.
- Attachments. Add files like PDFs that the student might need to complete the lesson.
Step 5: Add lessons automatically with AI mode
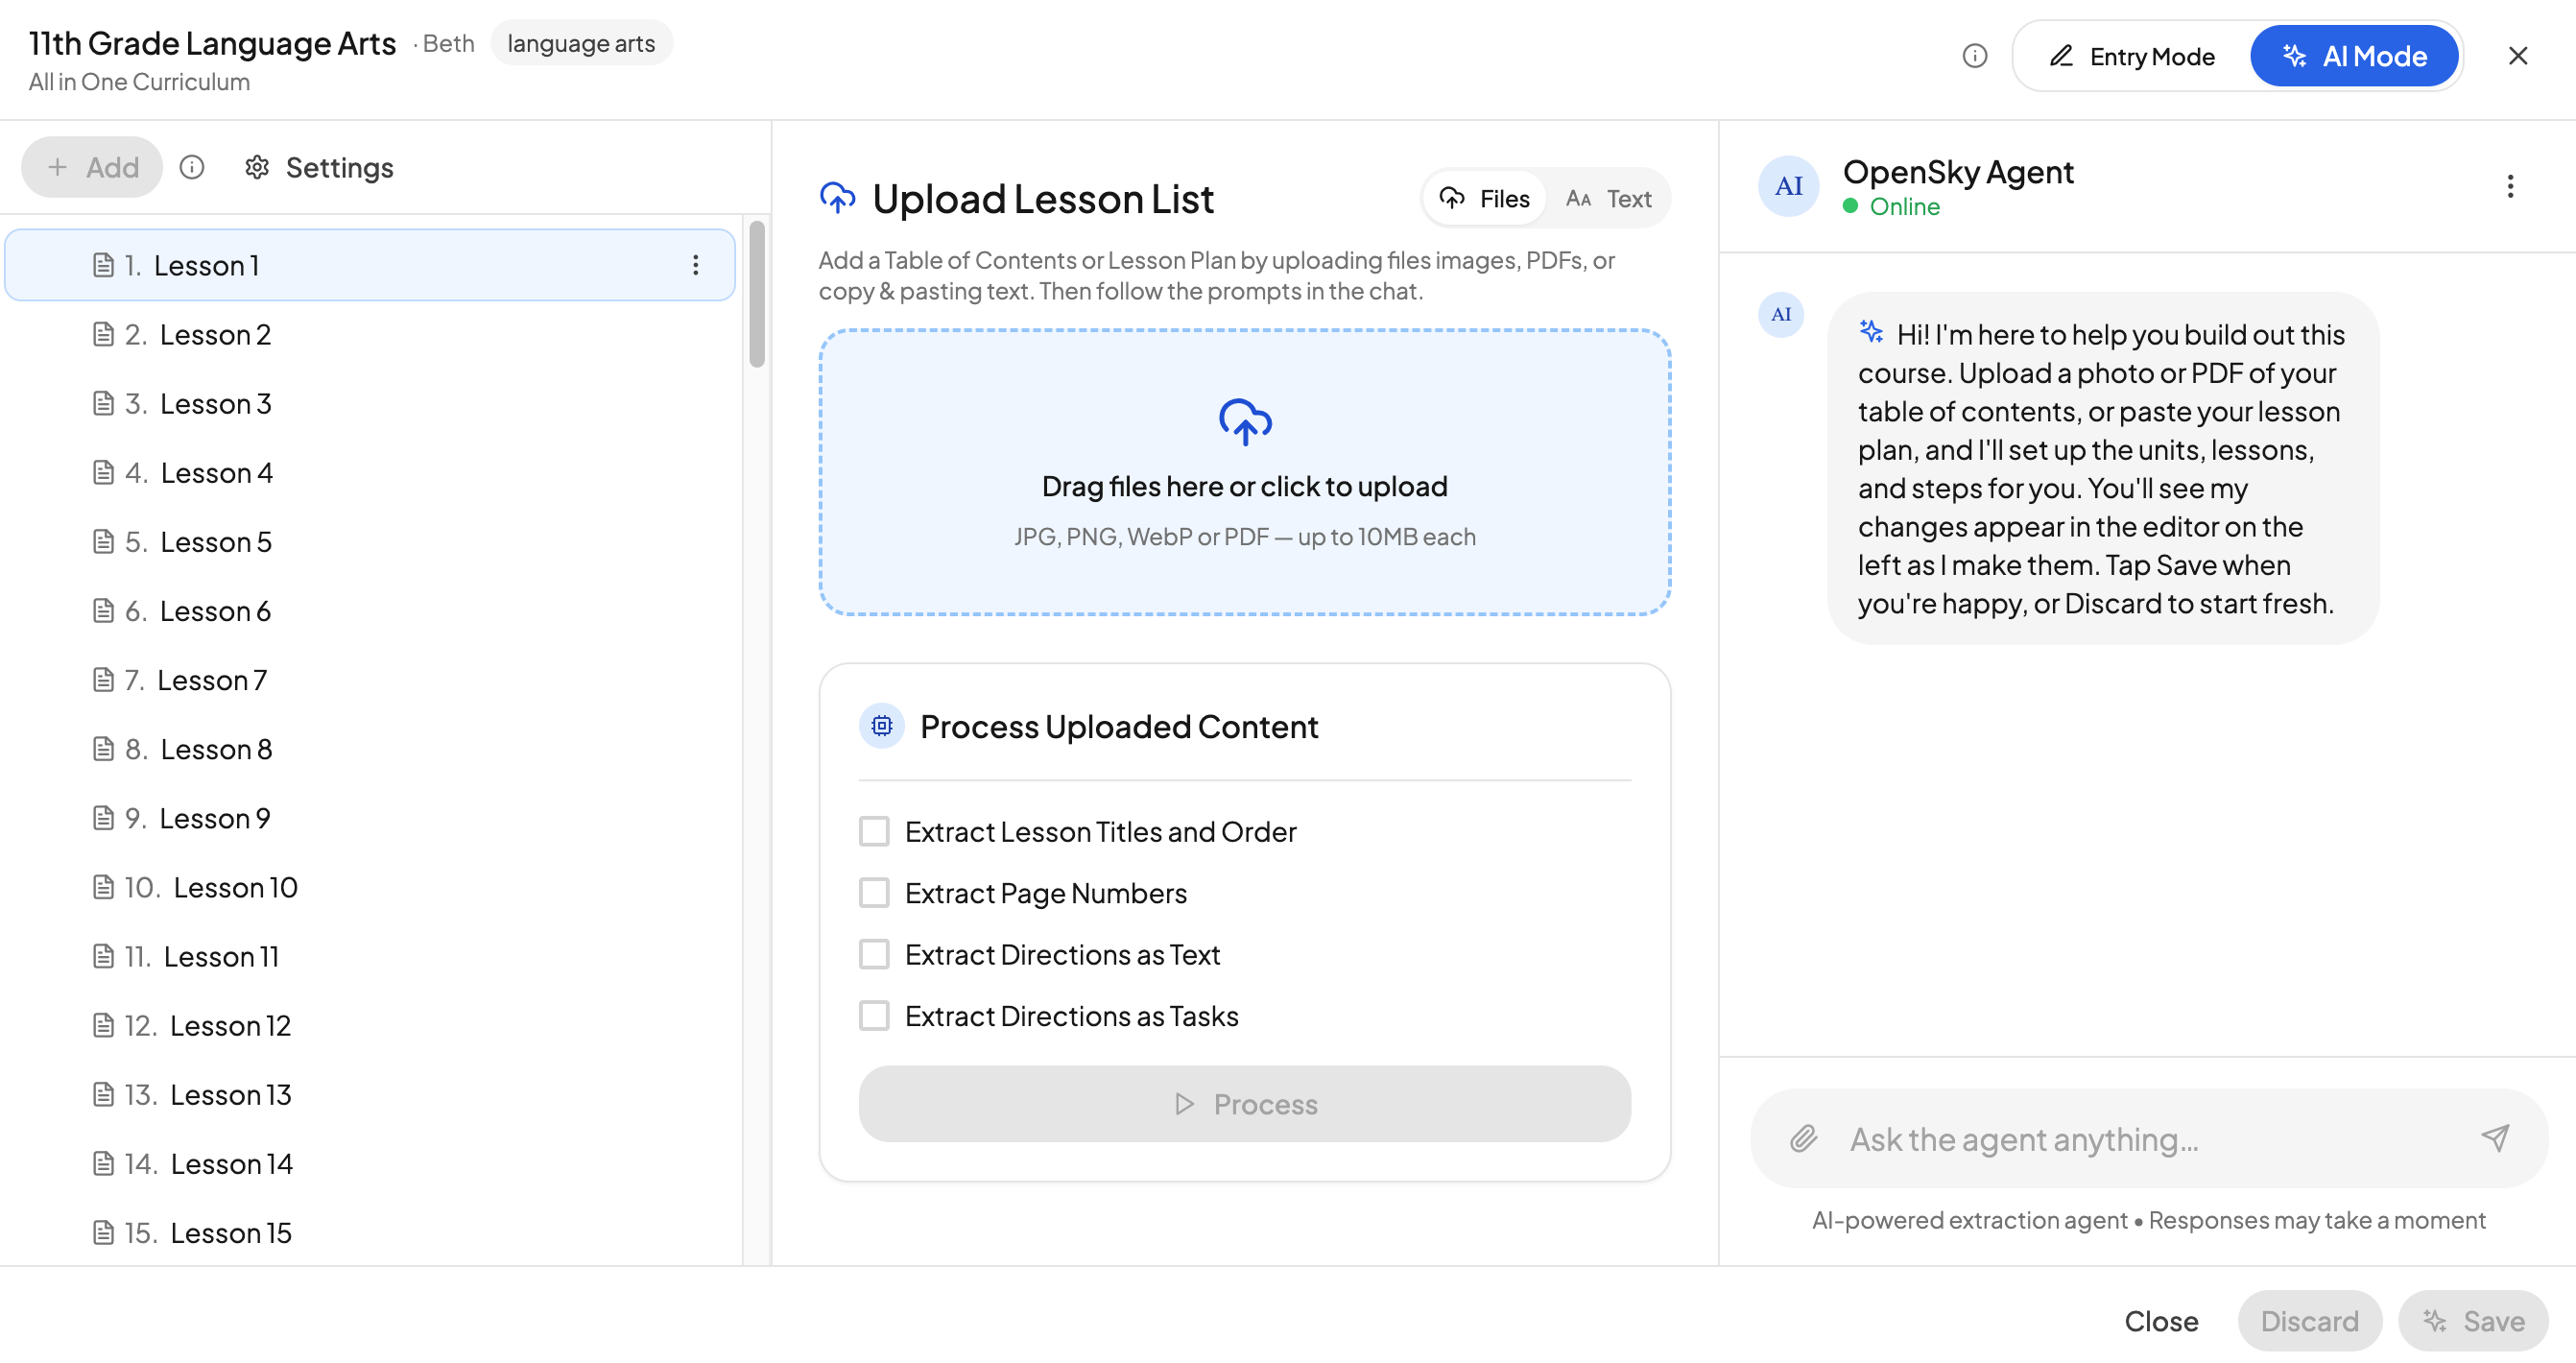
Instead of adding lessons one at a time, you can let OpenSky build them for you:
- Switch to AI mode in the course editor.
- Drag and drop a PDF that contains a table of contents, or switch to text mode and paste in a table of contents or spreadsheet.
- Tell OpenSky what you want extracted, such as lesson titles and page numbers. If you also want it to try to extract directions, select that option too.
- Hit Process. OpenSky will automatically add the content to your course.
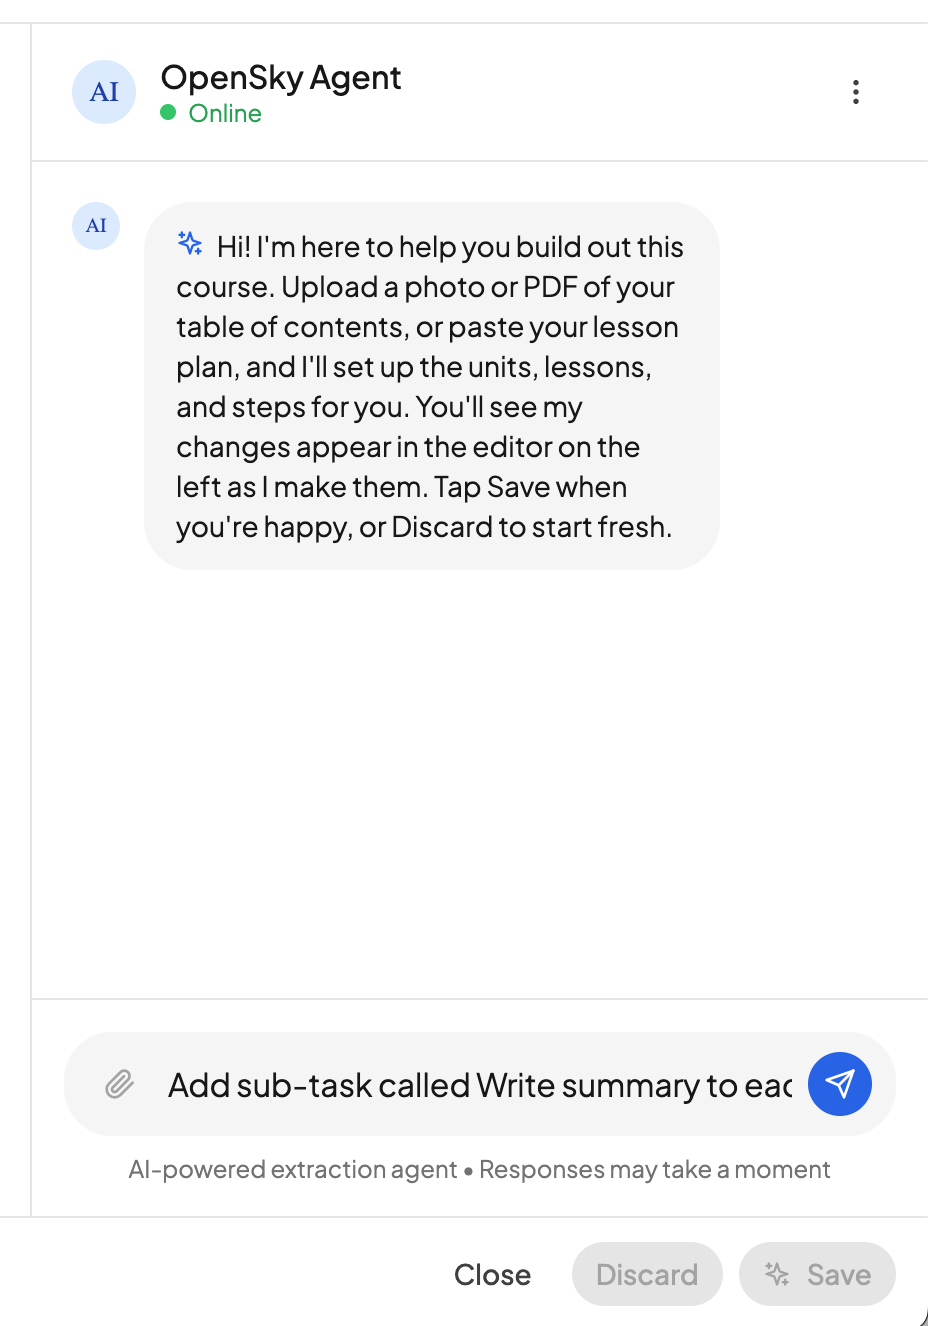
Step 6: Make bulk changes with the OpenSky agent
If you want to bulk edit content, you can ask the OpenSky agent to do it for you. It can add tasks, change titles, change numbering, and much more.
Step 7: Save
Hit Save, and everything you added will appear on the student's checklist.
Need more help?
Reach out any time at support@openskyplanner.com and we will be happy to help.