
Block Scheduling
Use the block schedule builder to rotate courses, start one course when another ends, teach several courses the same day, and set up A and B weeks.
Updated
Every course you enroll a student in already sits in its own block on a normal weekly schedule, so you never have to touch this tool if a traditional schedule is all you need. But when you want courses to work together — rotate two subjects, start one when another finishes, or run a different pattern every other week — the block schedule builder is where you do it. Drag and drop courses to build your schedule: rotate courses in a block, set what comes next, or just have a traditional schedule.
If you have not added courses yet, start with Courses.
Where to find it#
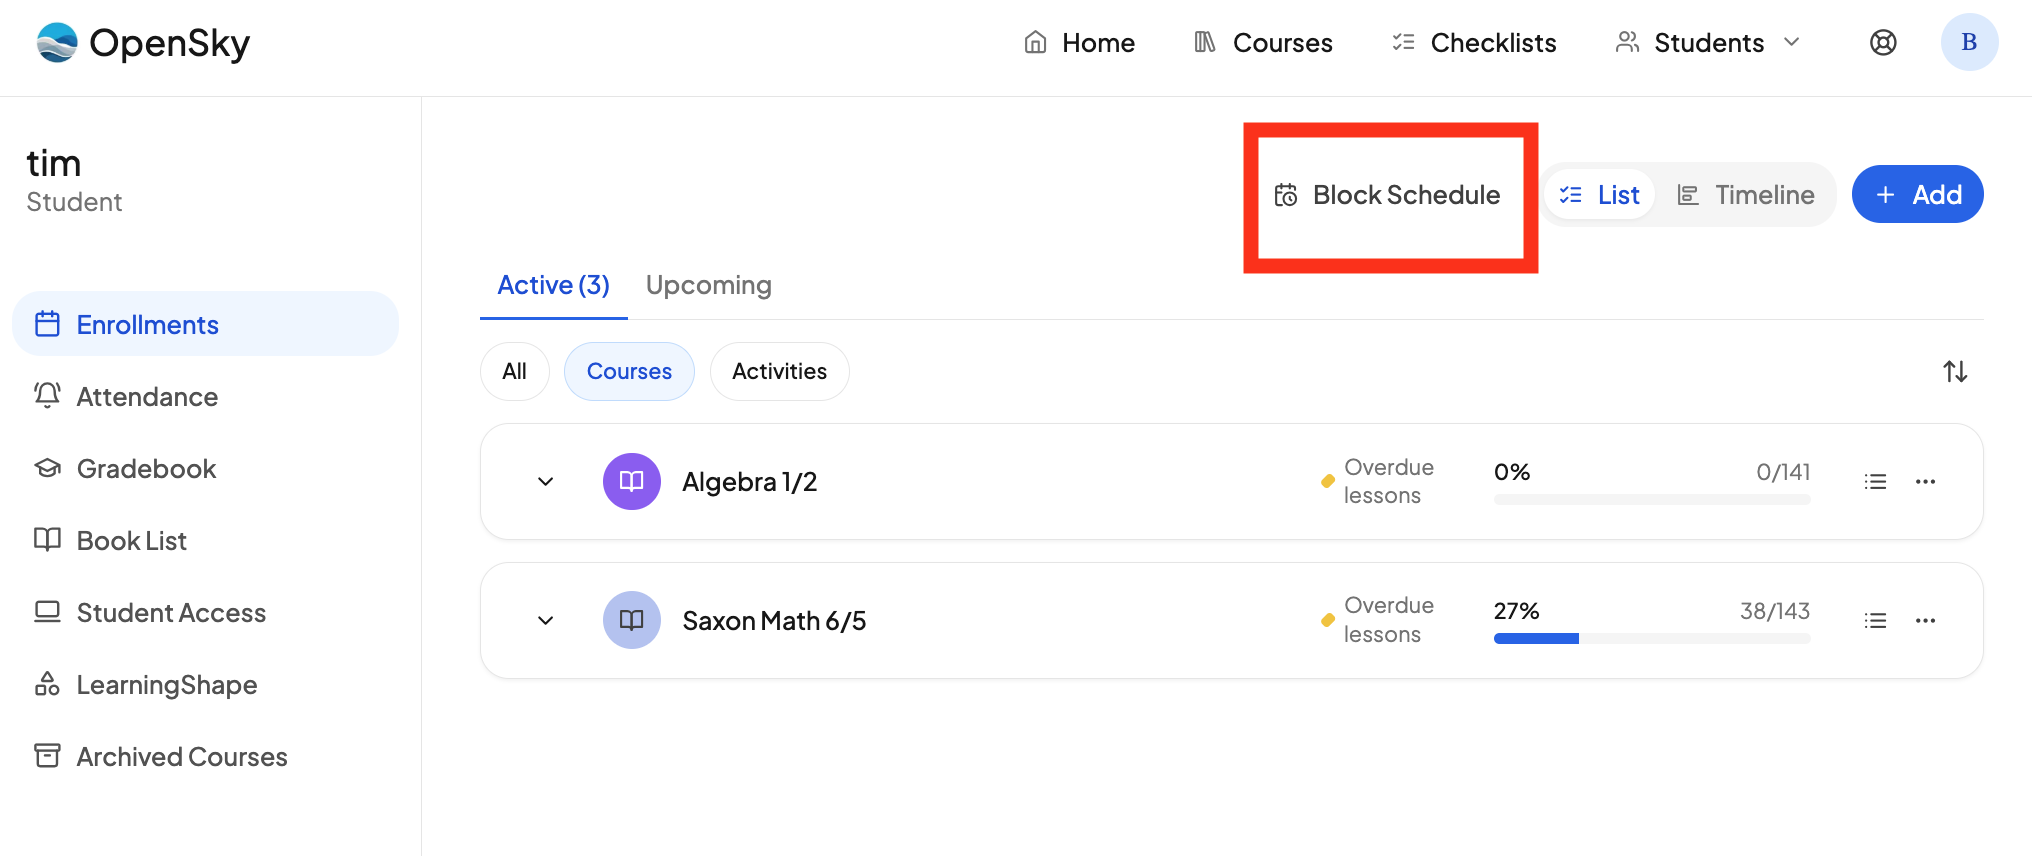
- Go to a student's dashboard.
- Click Block Schedule in the toolbar.
- When you are finished, click Save Schedule.
- Click Back to courses to return to the course list.
Nothing you do in the builder takes effect until you hit Save Schedule, so feel free to drag things around and see how they look first.
Drag and drop#
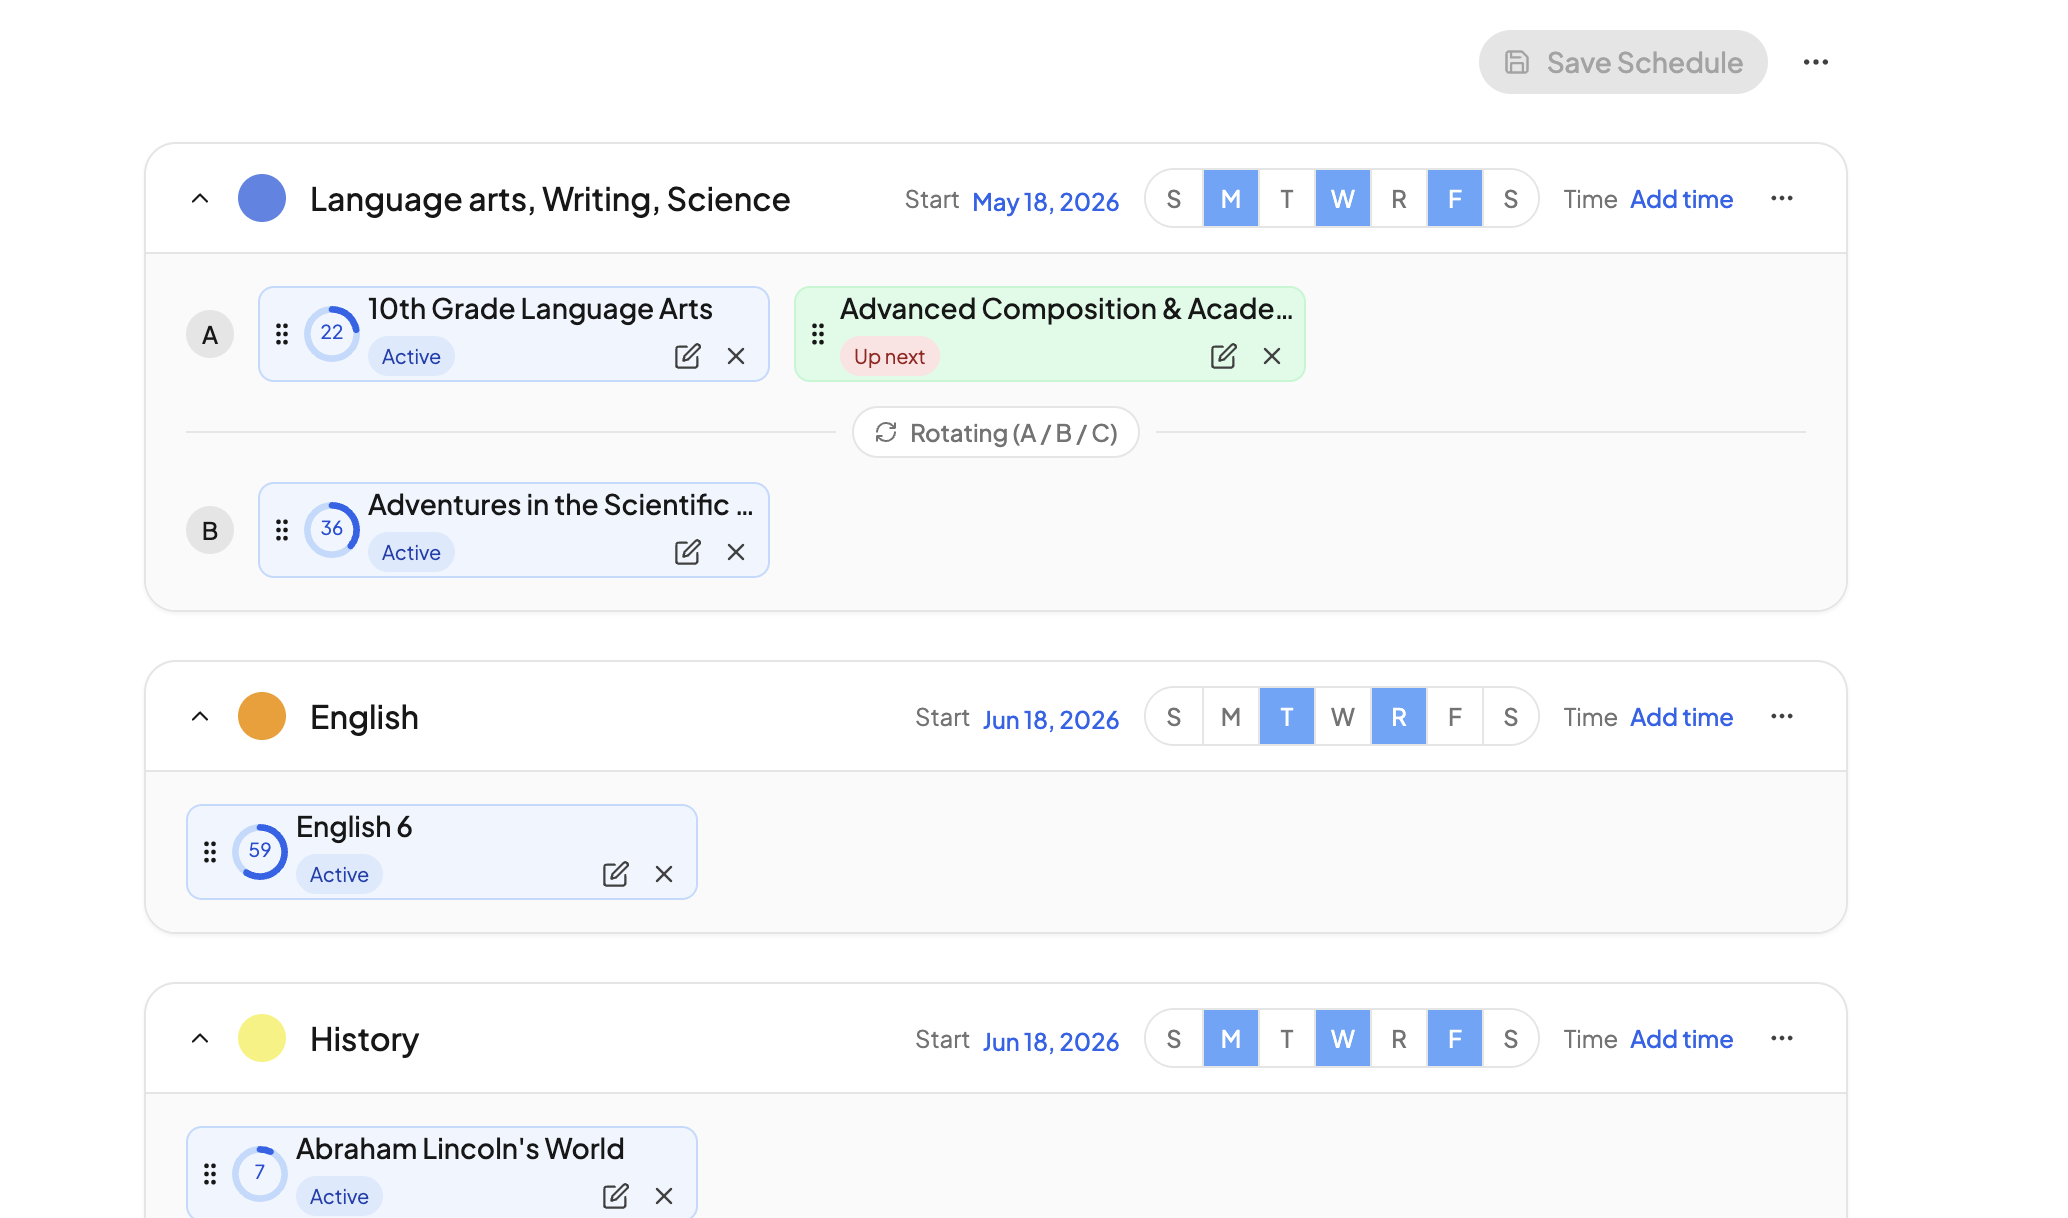
A block is a slot on the calendar: a start date, a set of days, and optionally a time. The course cards inside a block are what actually gets taught in that slot. You build your schedule by dragging course cards from one place to another.
Here is what each drop target does:
- Onto another course card in the same row. Reorders that row. The card in the first position is the course being taught right now.
- Onto the empty Up next slot at the end of a row. Adds the course to the back of that row's queue.
- Onto the Drop to be A/B Block area under a block. Creates a new row in that block, labeled A, B, C, and so on.
- Onto the Create new block line between blocks. Spins up a brand-new block with that course in it.
- Onto a collapsed block. Hover for a moment and the block opens up so you can drop inside it.
Two ideas do all the work here, and it is worth holding onto them: a row is a queue — what comes next — and the rows are the rotation — what happens on which day.
Start a course when another one ends#
Finishing Grammar in November and want Latin to pick up right where it left off? Put both courses in the same row of the same block.
- Drag the second course onto the Up next slot at the end of the first course's row.
- The front course shows an Active badge. The one behind it shows Up next.
- Drag the cards past each other if you want to change which one goes first.
When the first course runs out of lessons, the next one in the row automatically takes over the slot. There is no start date to set on the second course — it begins when the first one actually finishes. If your student falls behind or races ahead, the handoff moves with them.
Rotate between courses#
Want Art on Monday and Music on Tuesday, back to Art on Wednesday? That is a rotation. Rotations live in separate rows of the same block.
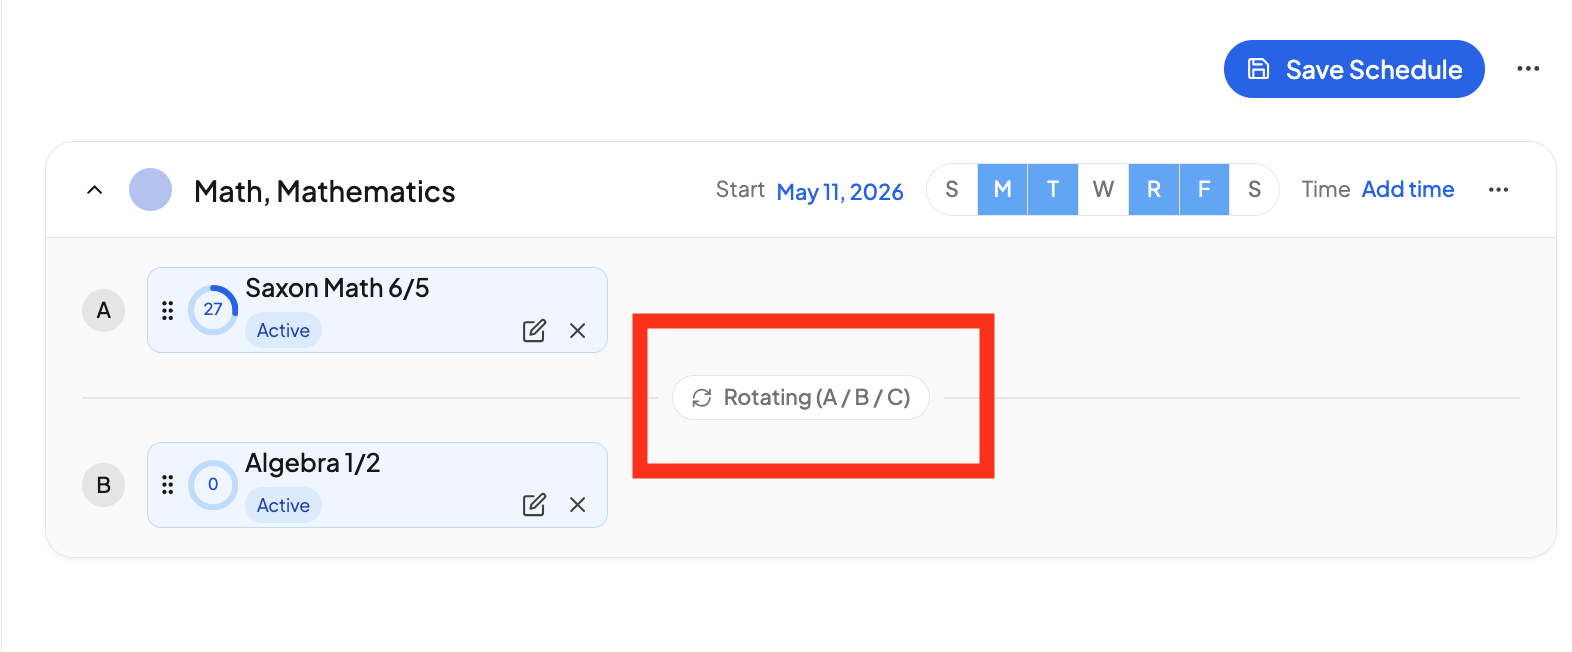
- Drag one course onto the Drop to be A/B Block area under the block. It becomes row B.
- Click the divider between the two rows to set the style to Rotating (A / B / C).
- Set the block's days with the day chips.
With two rows scheduled Monday through Friday, you get Art on Monday, Music on Tuesday, Art on Wednesday, Music on Thursday, Art on Friday — and the pattern carries into the following week. You can add a third row for a three-way rotation.
If one course in the rotation finishes, it simply drops out and the remaining rows keep rotating between themselves.
Teach courses on the same day#
Sometimes you want two courses in the same sitting rather than alternating.
- Put each course in its own row of the same block.
- Click the divider between the rows and set the style to All at once.
Now every row is worked on every scheduled day. Use this when the courses belong together — a Latin lesson and its vocabulary drill, for example — and you want them to share one start date, one set of days, and one time.
You can also just leave the courses in separate blocks and give both blocks the same days. They will land on the same day without being tied together. That is what a traditional schedule already does, and it is often the simpler answer.
Combine these#
The two ideas stack, and that is where the builder gets powerful. Say you want science three days a week, alternating between a textbook sequence and nature study:
- Create one Science block scheduled Monday, Wednesday, Friday.
- In row A, put Biology, then drag Chemistry onto its Up next slot.
- In row B, put Nature Study.
- Set the style to Rotating (A / B / C).
Row A holds a queue, so Biology runs until it is done and Chemistry picks it up automatically. The rows rotate, so science days alternate between whatever row A is currently on and Nature Study. One block, two behaviors.
Create A and B weeks#
Some plans run on a two-week pattern — co-op every other Thursday, or a heavier week followed by a lighter one.
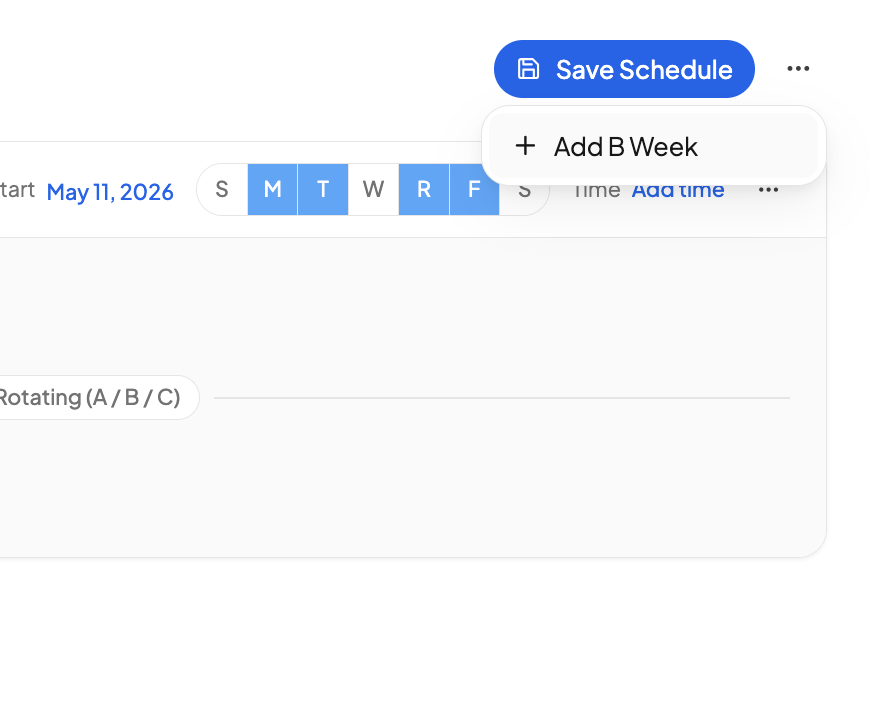
- Open the ⋯ menu at the top of the builder.
- Choose Add B Week.
- A Week A / Week B toggle appears in the toolbar. Switch to Week B and set the days you want for that week.
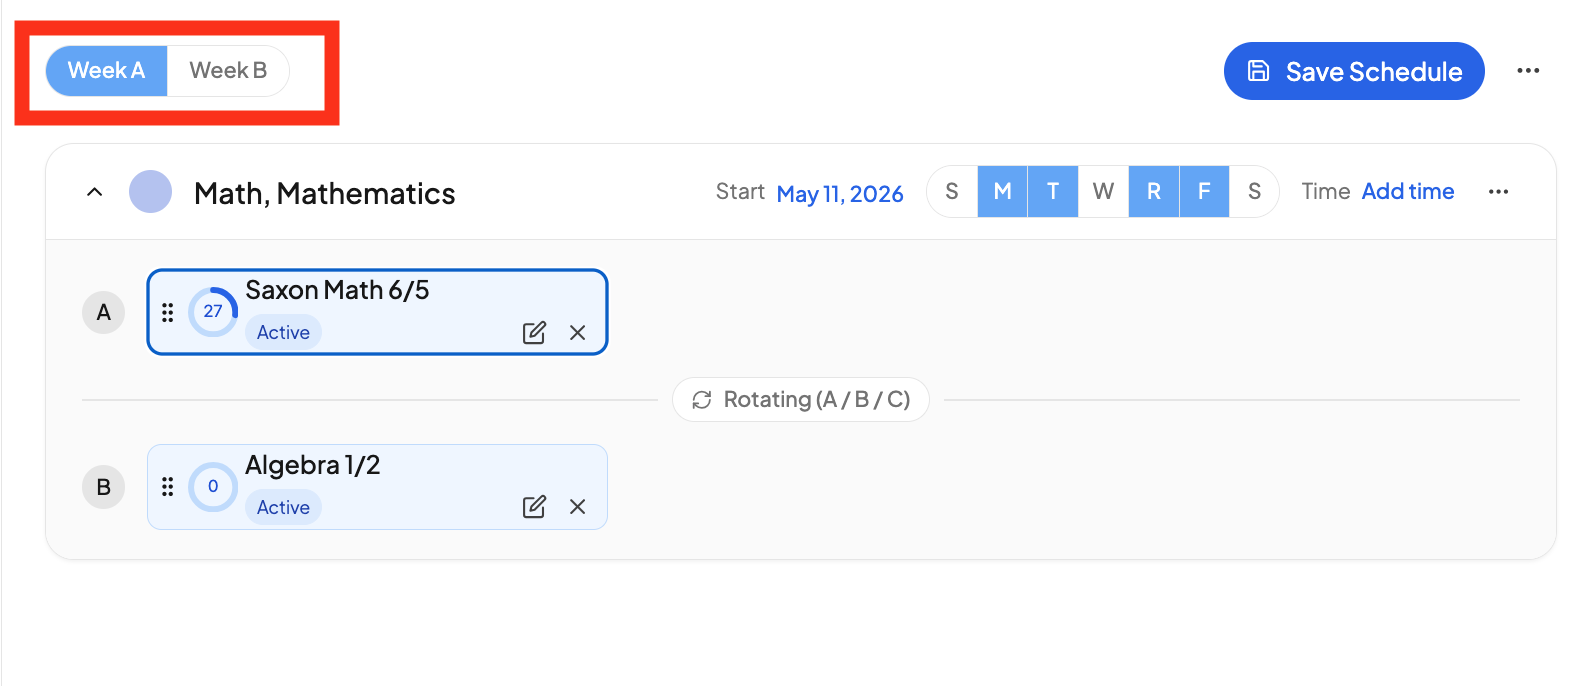
A few things to know:
- It applies to your whole routine, not one block. Every block becomes a two-week cycle, and Week B starts out as a copy of Week A so nothing is left half configured. From there you change only what you want to differ.
- The toggle is global. Switching to Week B changes which week the day chips are editing on every block on the page.
- A block's start date decides the pattern. The week containing a block's start date is always Week A. If you change that start date, which weeks count as A and which count as B shifts with it.
- Choose Remove B Week from the same menu to go back to a single repeating week.
Note that the row labels A, B, and C inside a block are a different thing entirely from Week A and Week B. The rows are the rotation within a block; the weeks are the two-week cycle across your whole routine.
Set a time for a block#
Click Time on a block card to give it a start time and a duration. This applies to every course in the block, on every day it runs — a block is one sitting, not a series of staggered lessons. If a block holds three courses, all three show up at that time.
Leave the time off entirely and the lessons simply appear on the day's checklist without a time attached.
Pause a block#
Taking a break from a subject without wanting to lose your place?
- Open the ⋯ menu on the block card.
- Choose Pause block.
The block stops putting lessons on the checklist and shows a Paused badge. Your progress and any lessons you have pinned to specific dates are untouched. Choose Resume block and everything comes back exactly where it was.
For day-to-day changes like sick days and moving a single lesson, see Moving a lesson and Overdue lessons.
Need more help?#
Reach out any time at support@openskyplanner.com and we will be happy to help.